Hiding and Showing Forum Links
Instructions
Note:- You want to hide or show the "Discussion Board" links in the 3 following places in your Bb Learn Course Shell.
- Also, the Bb Student mobile app lets students post to any individual discussion board forum not set to be unavailable on the "Discussion Board" webpage.
- Even if all other links to forums in your Bb Learn course shell are unavailable to students.
- So check all 3 places below!
- Also, there is no need to hide the "Discussion Board" link on the "Course Tools" or "Tools" webpage.
Hide/Show the "Discussion Board" link in the Left Navigation Panel
1. To hide the "Discussion Board" link in the left navigation panel:
(a) Click the circled down arrow next to "Discussion Board."
(b) Click "Hide Link."
(c) A crossed-out square icon will appear next to the "Discussion Board" link, indicating the link is hidden to students.
![]()
2. To show the "Discussion Board" link in the left navigation panel:
(a) Click the circled down arrow next to "Discussion Board."
(b) Click "Show Link."
(c) No crossed-out square icon will be appear next to the "Discussion Board" link.
![]()
Hide/Show Each Individual Discussion Board Forum Link on the "Discussion Board" Page
1. Click the "Discussion Board" link in the left navigation panel.2. Hover your mouse pointer over a forum's name.
3. Click the circled down arrow next to the forum's name.
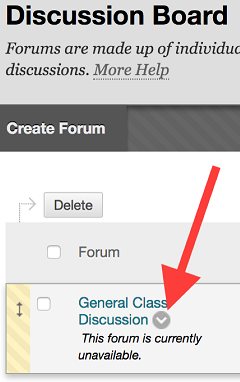
4. Click "Edit."
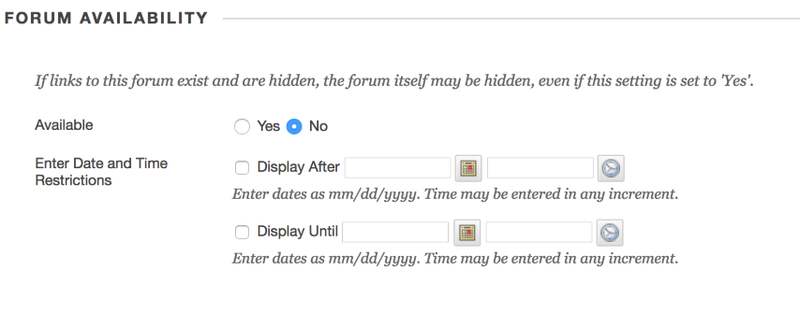
5. To set a forum to never be available to students:
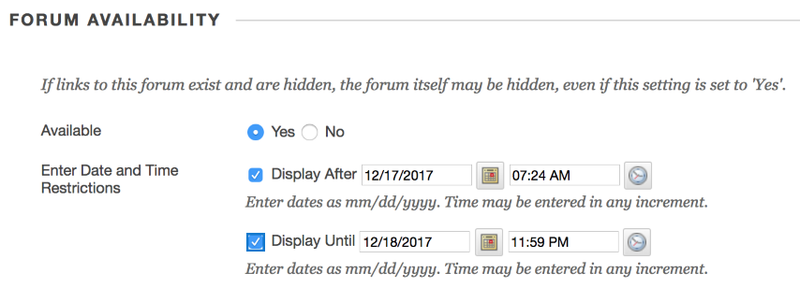
(a) Under "FORUM AVAILABILITY," select "Yes" next to "Available."
(b) Uncheck the boxes next to "Display After" or "Display Until."
(c) Scroll up or down, and click "Submit" (not pictured).
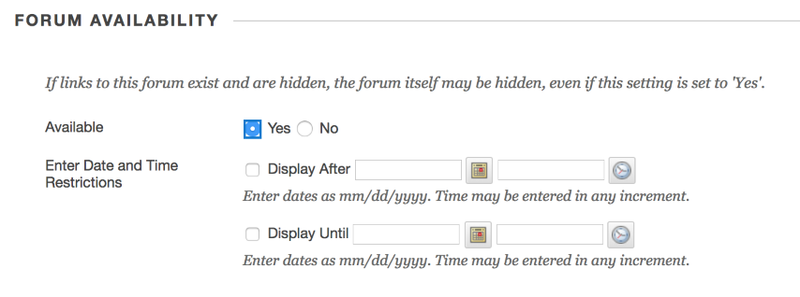
6. To set a forum to always be available to students:
(a) Under "FORUM AVAILABILITY," select "Yes" next to "Available."
(b) Uncheck the boxes next to "Display After" or "Display Until."
(c) Scroll up or down, and click "Submit" (not pictured).
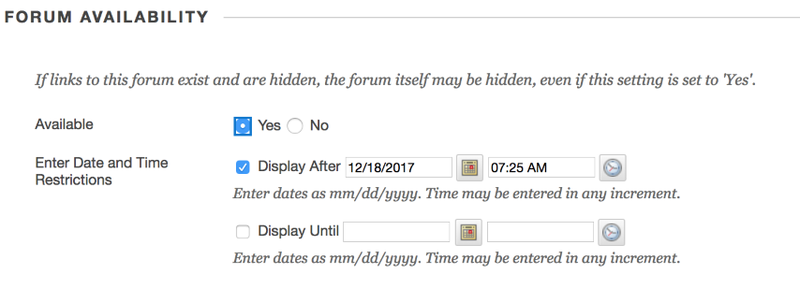
7. To set a forum to display after a certain date/time to students:
(a) Under "FORUM AVAILABILITY," select "Yes" next to "Available." (And not "No.")
(b) Check the boxes next to "Display After."
(c) Uncheck the box next to "Display Until."
(d) Enter dates/times in the "Display After" row.
(e) Scroll up or down, and click "Submit" (not pictured).
8. To set a forum to display after and until certain dates/times to students:
(a) Under "FORUM AVAILABILITY," select "Yes" next to "Available." (And not "No.")
(b) Check the boxes next to "Display After" or "Display Until."
(c) Enter dates/times in the "Display After" and "Display Until" rows.
(d) Scroll up or down, and click "Submit" (not pictured).
9. Repeat steps 2-8 for all other discussion board forums on the "Discussion Board" page.
(a) More than 25 forums?
i. Click "Show All" at the bottom of the primary discussion board webpage to see all forums.
Show Each Individual Discussion Board Forum Link in Each "Week" in the Left Navigation Panel
You always want links to individual discussion board forums in "Week" content areas to be available to students if you intend to use that at any time in your Bb Learn course shell.
If you do not intend to use a forum link in a "Week" content area at any time in your Bb Learn course shell, delete it. If you need instructions for that, contact us.
Otherwise, here is how to make individual discussion board forums in "Week" content areas available to students
1. Click a "Week" link in the left navigation panel.
(a) Example: "Week 1" or "Week 2" or "Week 3" and so on.

2. Hover your mouse pointer over the discussion board forum link.
(a) Scroll down to find the forum link, in necessary.
3. Click the circled down arrow next to the forum link.

4. Click "Edit."
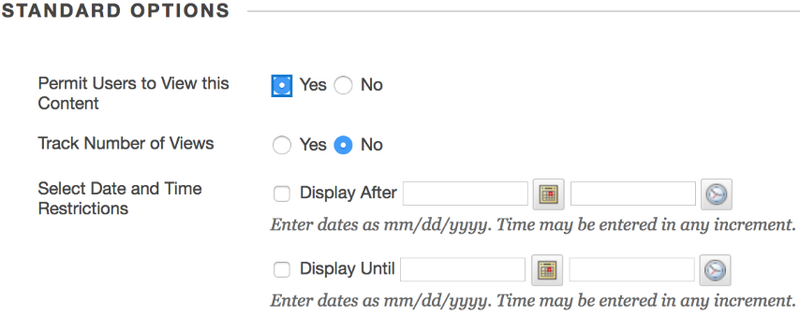
5. To set a forum course link to always be available to students:
(a) Scroll down to "STANDARD OPTIONS," and select "Yes" next to "Available."
(b) Uncheck the boxes next to "Display After" or "Display Until."
(c) Scroll up or down, and click "Submit" (not pictured).
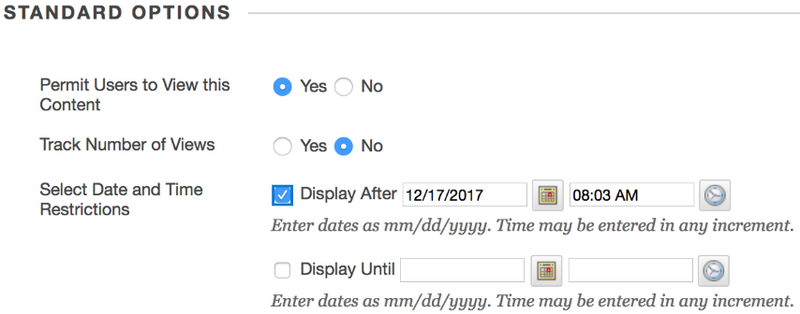
6. To set a forum course link to display after a certain date/time to students:
(a) Scroll down to "STANDARD OPTIONS," and select "Yes" next to "Available." (And not "No.")
(b) Check the boxes next to "Display After."
(c) Uncheck the box next to "Display Until."
(d) Enter dates/times in the "Display After" row.
(e) Scroll up or down, and click "Submit" (not pictured).
7. Repeat steps 1-8 above for each "Week" left navigation panel link.
