Bb Learn Groups -- Manual Enroll Group Set Creation
What is a Group Set?
A group set is a set of two or more groups. You can create multiple groups simultaneously by creating a group set, and you can edit the settings and memberships of all the groups in a group set simultaneously.
The directions below are for group sets where you manually enroll students.
Instructions [Video Form, watch in order]
Avoid this Option
Instructions
Note, that when you manually enroll students, you can randomize enrollments with that option as well.
Manual enroll is the recommended option if you don't have a preference otherwise.
- Click Users and Groups > Groups in the left navigation panel of your Bb Learn course section
• Click "Users and Groups".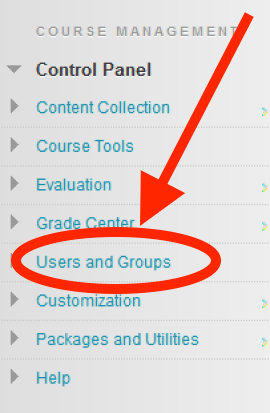
• Click "Groups".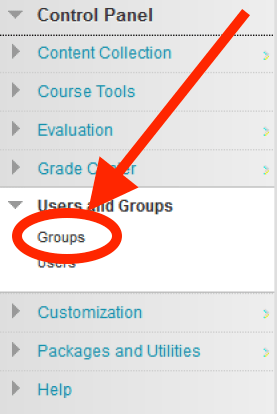
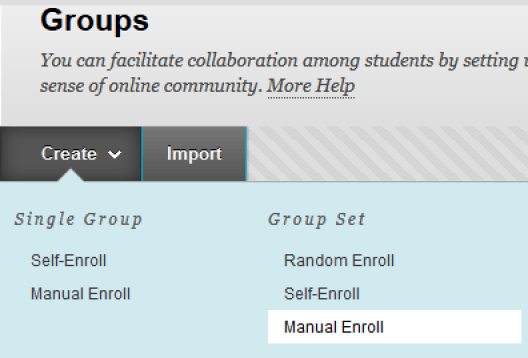
- Click Create > Group Set > Manual Enroll.
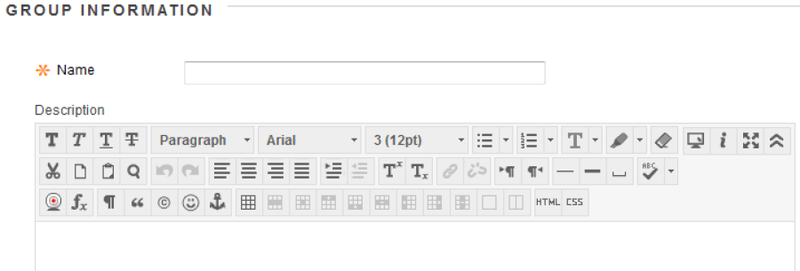
- Put in a "Name" for the group set. Add a description if you want.
- Choose if the groups should be visible to students or not.
(a) If you choose "No," then you will later need to make these groups visible/available for your students to use them.
(b) See the Important Notes section further down this webpage for how to make groups available.

- KEEP checked the following tools. (Uncheck the other tools, unless you really want them to use them.)
(a) Discussion Board
(b) Email
(c) File Exchange
(d) Blackboard Collaborate Ultra
1. Allow all group members to create and access session recordings.
• "Content Market Tools" and "Academic Materials" have no effect if checked or unchecked.
• All other tool options work (if checked).
• All are checked below but we do recommend only checking the tools indicated above, unless you have a specific purpose in mind for the other tools.
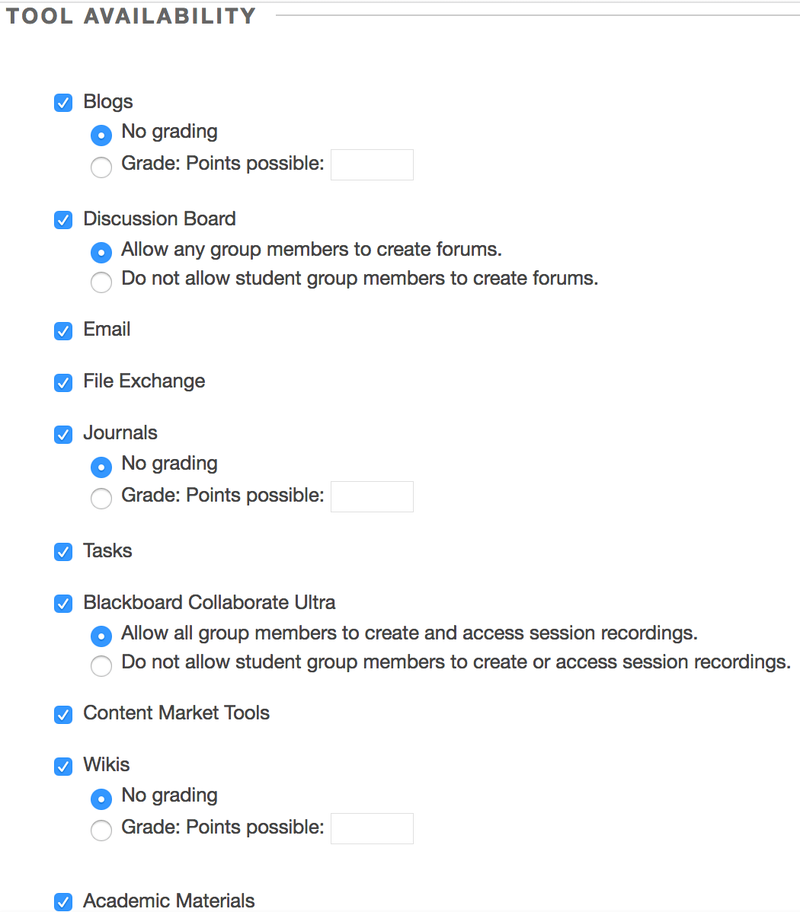
- Check or uncheck the box under "Module Personalization Setting" unless you have a reason not to.
(a) More about modules is found in a section below.
(b) No one uses these. Very few have uses and none have uses here.

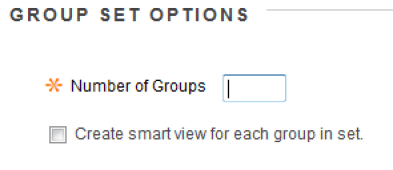
- Provide the number of groups you want to create.
- Check the box to create a "smart view" (a display that only shows the members of a group in "Full Grade Center") for each group in the set.
- Click "Submit."
- Check the box to "Hide members already in another group in this set."
(a) This is on the "Edit Group Set Enrollments" webpage, under "GROUP SET ENROLLMENTS."
(b) This avoids technical issues by preventing 1 student from being in multiple groups in this group set.

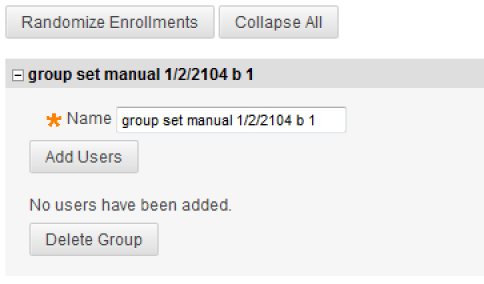
- Click "Add Users" to add 1 or more students ("Users") to a group.
WE HIGHLY RECOMMEND USING RANDOMIZE ENROLLMENTS!
That just randomly and instantly puts students in groups.
SKIP TO STEP 13 IF YOU RANDOMIZED ENROLLMENTS.
If you want to select which specific students are in which specific groups, proceed with step a & b and step 12...
(a) Edit the "Name" of each group (if you wish).
(b) To delete a group, click the "Delete Group" button.
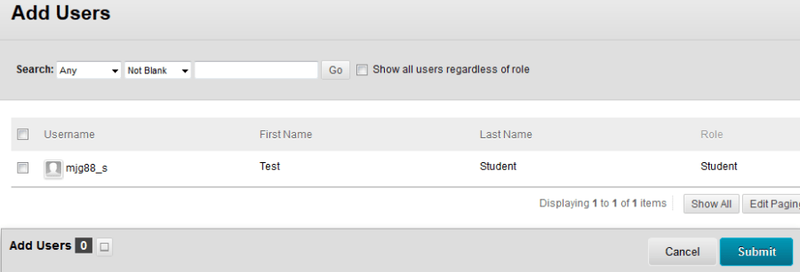
- If adding 1 or more students ("Users") to a group, check the box next to the name of the student you wish to add, or search for the student.
(a) To see non-student users, select "Any" and "Not Blank" from the drop-down menus next to "Search" at the top, check "Show all users regardless of role," and click "Go."
(b) Click "Submit" when you have selected all the users that you wish to add.
- Click "Add Group" at the bottom of the webpage if you wish to add a group to this group set.

- When finished adding/editing group members and groups, click "Submit."
Important Notes
Review the important notes on groups webpage below if you use groups.
