Bb Learn Groups -- Self-Enroll Group Set Creation
Avoid this Option When Creating Groups or Group Sets
What is a Group Set?
A group set is a set of two or more groups. You can create multiple groups simultaneously by creating a group set, and you can edit the settings and memberships of all the groups in a group set simultaneously.
Video Instructions [Watch in order]
https://www.youtube.com/watch?v=Ajb1LMb41wo
https://www.youtube.com/watch?v=NEEZsbJAnJE
Create a link to the "Groups" page in the left-hand navigation panel (course menu) in your Bb Learn course shell. Here's how:
- In your Bb Learn course shell, click the plus or + sign at the top of the left-hand course menu.
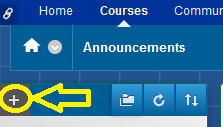
- Click "Tool Link."
- Enter a "Name" for this link, such as "Groups" (without quotes) or what you will.
- From the "Type" drop-down menu, choose "Groups."
- Check the "Available to Users" box so that this new link is visible to students.
- Click "Submit."
Please note:
- Students cannot see anything below the "Control Panel" area of the left-hand course menu in a Bb Learn course shell.
- Students can also get to their "Groups" webpage by clicking on the "Course Tools" link (if available) *ABOVE* the "Control Panel" in the left-hand course menu, then clicking "Groups."
Remember to make the groups available (if you didn't when creating the groups). Here's how to do this:
If you did not select "Yes" to make a group or group set available when you set up the group or group set, you must at some point make this group or group set available to students before they can use it.
The page below tells you how to edit settings for groups or groups sets, and one of these settings is group or group set availability, so use the instructions at the page below to edit the group set's settings and make the group available.
Review the important notes webpage below.
Once self-enroll group set is created, students can visit the "Groups" page, click on a group name, and follow the onscreen instructions to sign-up (or add themselves) to that group.
The final section below has a brief description of modules, which groups can use.
Allow Students to Create their Own Groups
You can allow students to create their own groups in Bb Learn. These groups will not be part of a group set, however.
Allowing students to create their own groups not only allows students to self-enroll in groups but allows students to name, describe, and set a maximum number to their groups.
PLEASE NOTE: If you are using Bb Learn group assignments, it will be much easier in the long run to create self-enroll group sets than allowing students to create their own groups.
Instructions for allowing to students to create their own groups are provided by the page below.
Creating Self-Enroll Group Sets
The directions below are for group sets where you have students enroll themselves into groups that they choose.
You must make "Groups" available after all the students have signed up for a group, or else students cannot use their group areas. One of the sections below will cover this.
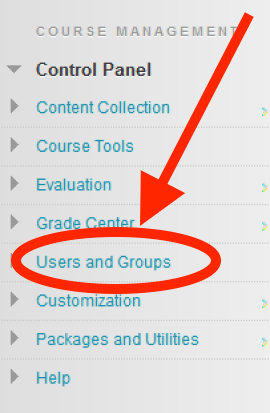
- In the "Control Panel," click "Users and Groups," then click "Groups."

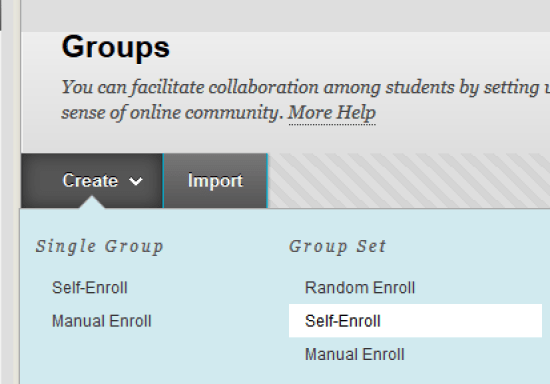
- Click "Create" and under "Group Set" select "Self-Enroll."
- Put in a "Name" for the group set. Add a description if you want.
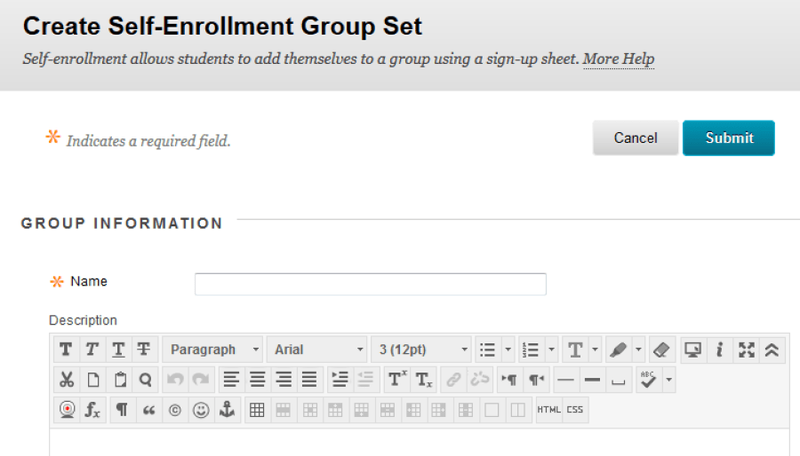
- Choose if the groups should be visible to students or not, or if only the sign-up sheet only should be offered.
(a) The sign-up sheet is what students who are self-enrolling will initially see on the "Groups" page, and it's where they sign up for one of the groups.
i. The "Adding a Link to the Groups Page" section below will tell you how to make a link to the "Groups" page.
(b) If you choose "No" or "Sign-up Sheet Only," at some point you will have to manually set these groups to be available before students can really use them.
i. The "Making Groups Available" section further down this page will tell you how to make a group or group set unavailable.

- Uncheck any tools that you don't want students to use.
• "Content Market Tools" and "Academic Materials" have no effect if checked or unchecked.
• All other tool options work (if checked).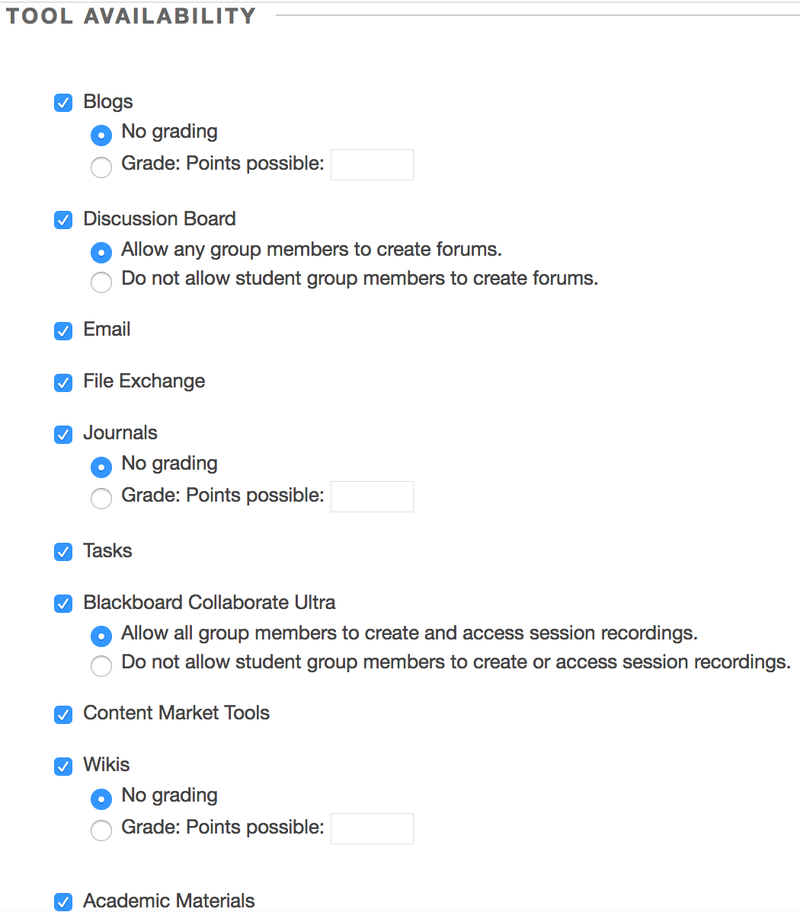
- Uncheck the "Module Personalization Setting" box if you don't want students to be able to add modules to their own group space. More about modules is found at the end of these instructions.
(a) This gives students the ability to customize the color scheme of their group area, add a banner text or image, or add modules to their group area. For more on modules, see the link below.
• "Modules" section of Bb Learn Groups -- Group Sets or Creating Multiple Groups

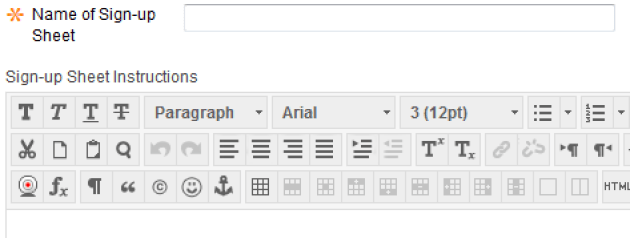
- Provide a name for the "Sign-Up Sheet". If you want, provide instructions as well.
- The next section has 3 settings to configure, shown in the screenshot below, and described
(a) Provide the maximum number of members that each group can have.
(b) Click the "Show Members" box if you want to allow students to see the names of other people in the group before they sign-up.
(c) If you don't want students to sign up from the "groups listing page" (also known as the "Groups" page), uncheck this box.

- Provide the number of groups you want to create. If you want to create a "smart view" (recommended -- see below) for each group in the set, check the box for it.
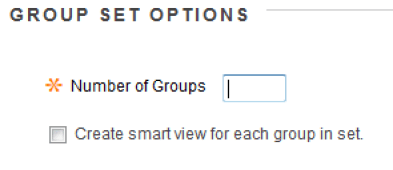
(a) We recommend checking this. A “Smart View” is a pre-configured way of displaying certain columns and/or users in “Full Grade Center.” You can check this box, and a “Smart View” will be created displaying only the students in the group in “Full Grade Center.” You can access each "Smart View" by entering "Full Grade Center," clicking "Manage," and clicking "Smart Views." You can still easily access the normal view in “Full Grade Center” that displays all students, and creating one or more "Smart Views" doesn’t impact students at all. Also, this is one setting that you can’t enable later for some reason in the "Groups" area, but you can create a "Smart View" for any group by clicking to expand "Users and Groups" in the left-hand course menu, clicking "Groups," hovering over a group name with your mouse, clicking the circled down arrow next to that group name, and clicking "Create Smart View." However, checking the create "Smart View" option while creating a new group set saves time. These "Smart Views" may need to be remove after a course copy, but if you need help with that, let us know. - Then click "Submit."

Create a link to the "Groups" page in the left-hand navigation panel (course menu) in your Bb Learn course shell. Here's how:
- In your Bb Learn course shell, click the plus or + sign at the top of the left-hand course menu.
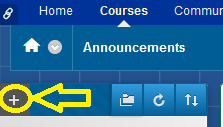
- Click "Tool Link."
- Enter a "Name" for this link, such as "Groups" (without quotes) or what you will.
- From the "Type" drop-down menu, choose "Groups."
- Check the "Available to Users" box so that this new link is visible to students.
- Click "Submit."
Please note:
- Students cannot see anything below the "Control Panel" area of the left-hand course menu in a Bb Learn course shell.
- Students can also get to their "Groups" webpage by clicking on the "Course Tools" link (if available) *ABOVE* the "Control Panel" in the left-hand course menu, then clicking "Groups."
Making Groups Available
If you did not select "Yes" to make a group or group set available when you set up the group or group set, you must at some point make this group or group set available to students before they can use it.
The page below tells you how to edit settings for groups or groups sets, and one of these settings is group or group set availability, so use the instructions at the page below to edit the group set's settings and make the group available.
Modules
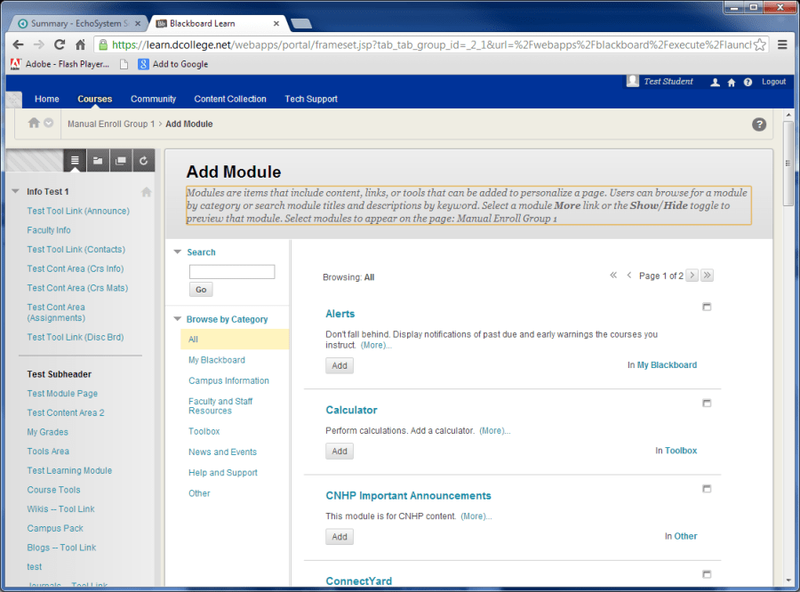
Modules are small windows that contain content, links, or various tools. Modules can only be seen on Module webpages in Bb Learn. You can enable Bb Learn groups to have customizable Module webpages.