How to create Discord channels for courses
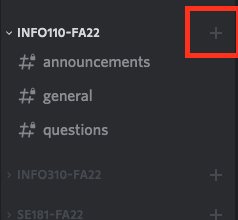
1. Click on the " + " next to the name of the category for your course
2. Select whether you would like a text or voice channel and add a name for the channel
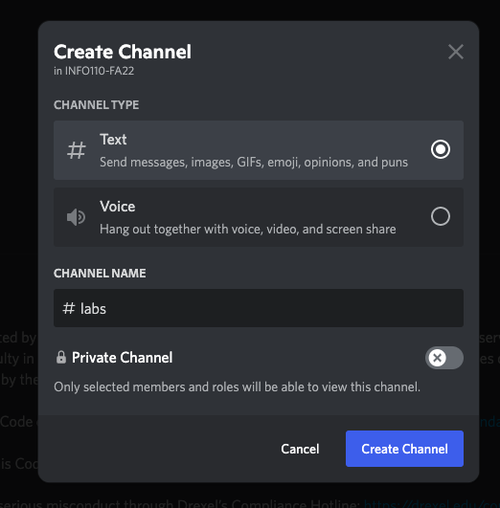 *You do not need to turn on "Private Channel" because the channel should inherit the same access as the category. When the channel is created, there will be a lock on it to indicate it is "private" from the entire server
3. Check that the channel is private. If you see a lock on the " # " next to the channel name, that means the channel is not visible to the entire server, which is good.
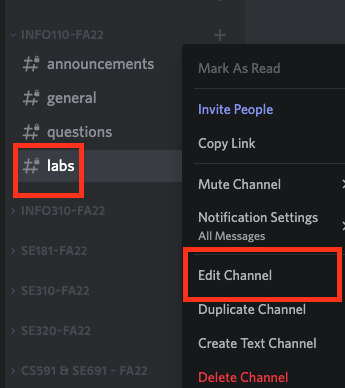
If you don't see the lock, or want to check permissions, right-click on the channel or click the small gear on the channel
If you right-click the channel, you can select "Edit Channel" to look at channel settings
4. Click on the "Permissions" tab. Generally, if the channel is marked as being synced with the category, your permissions should be defaulted to give access for you, TA's, and students to send and read messages

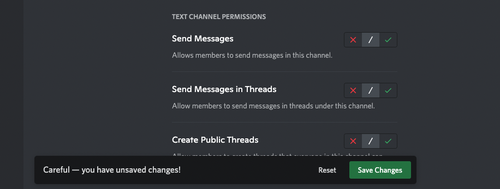
5. If there is an issue with the permissions or you want to change them, scroll to see "Advanced Permissions". You may need to click on the arrow to open the Advanced Permissions drop-down
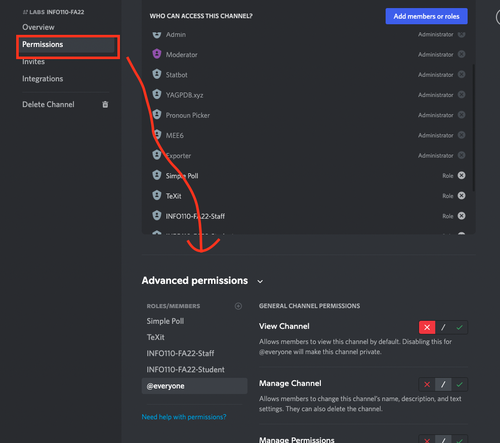
@everyone - This is the permission that prevents the whole server from seeing your course channels. If " View Channel" is marked with the X, then your channel is hidden from students who aren't in your course, other faculty, and staff. Keep this permission off for @everyone
@{Course}-{Term}-Student - This is the role your students have. We recommend having "View Channel", "Send Messages", and "Read Message History" ON
@{Course}-{Term}-Staff - This staff role applies to all professors and TAs of the course
{Course} is the name of your course, eg CS260.
{Term} is the term your class is running in, for example FA22 or WI23.
5. Click "Save Changes" to save the new permissions for the channel. If you don't click this you will need to make new changes again
