VPN -- Mac -- Install Cisco AnyConnect VPN to Connect to Drexel Network
Drexel's VPN Now Requires Multi-Factor Authentication (MFA)
Once you login to the VPN, and click "Connect," answer your phone, and press the # sign. Or press "Approve" in the Microsoft Authenticator App notification (unlocking your phone may be required).
To set-up MFA, or change to the Microsoft Authenticator App (especially if you travel outside the U.S. and wish to avoid excessive call or data roaming charges), see the following webpage.
What Drexel's Cisco AnyConnect VPN Looks Like
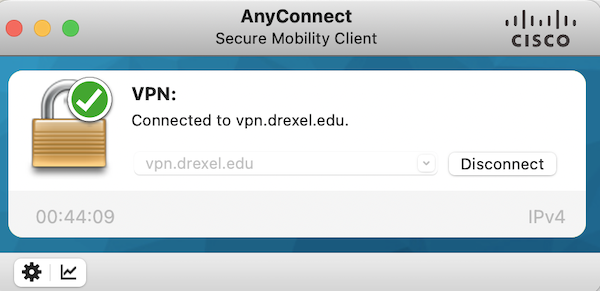
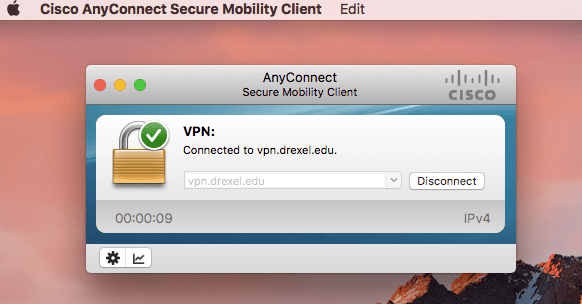
At least on a Mac or Windows laptop or desktop computer, this is what the Cisco AnyConnect VPN looks like when you are connected.
Installation
If you already installed, scroll down to the "Use" section below.
Do the following to install the "Cisco AnyConnect" VPN application on a Mac computer.
This VPN application will let you connect to Drexel's network when you are off-campus, and helps you access Drexel online resources.
- Visit https://vpn.drexel.edu in a web browser, and login with your DrexelOne userid and password.
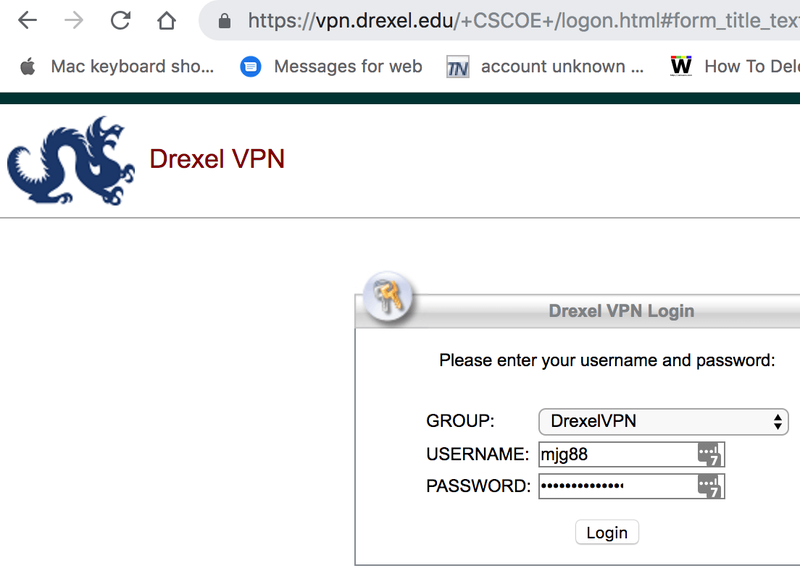
- Click "Start AnyConnect".
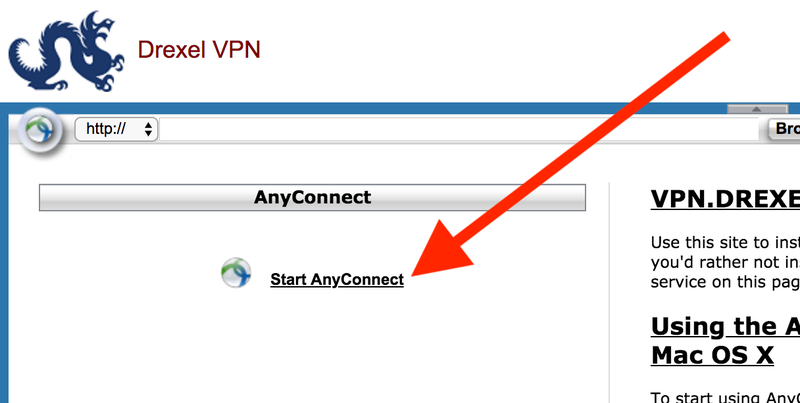
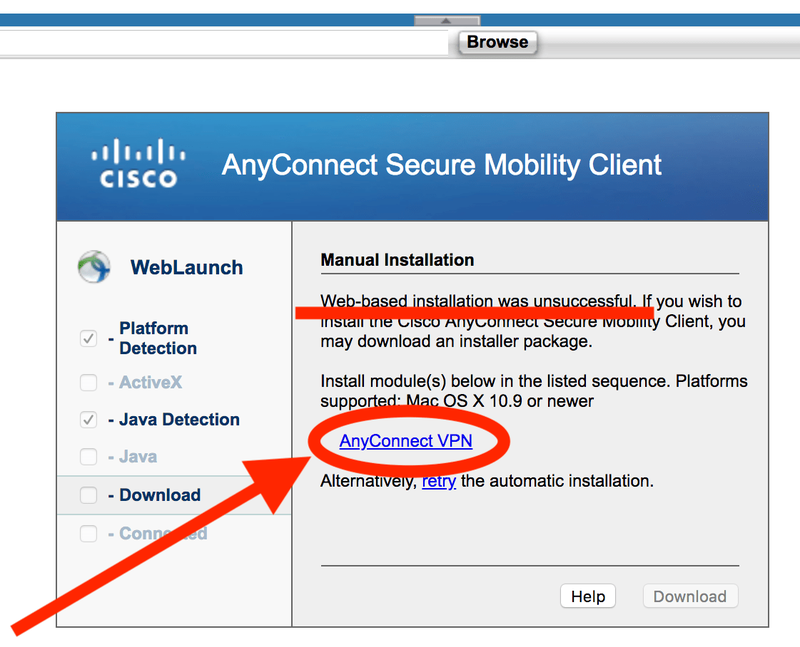
- Allow the "Web-based installation" to fail or be "unsuccessful."
- Then click "AnyConnect VPN" under "Manual Installation."
We cannot provide a direct link here for the installation file that does not require you to repeat all of the above steps again.
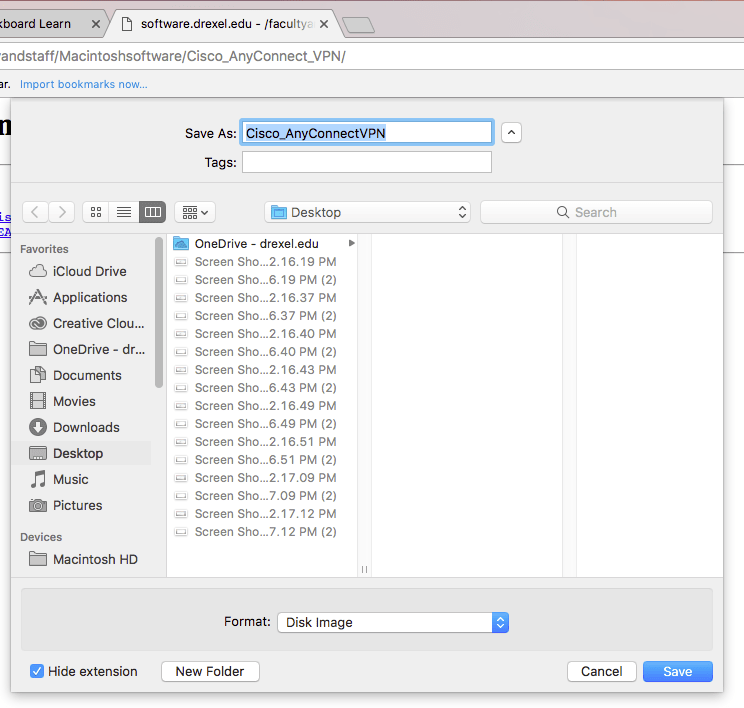
- Download/save the Cisco_AnyConnectVPN.dmg (Disk Image) file to your Mac computer.
- Open/double-click the "Cisco_AnyConnectVPN.dmg" on your Mac.
And then open/double-click the "any-connect-macosx....pkg" file on your Mac.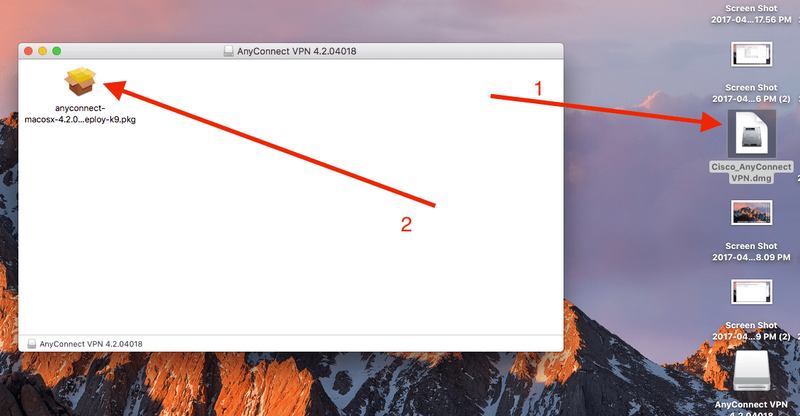
- Follow the onscreen instructions to install the "Cisco AnyConnect" application on your Mac.
- See the next section for how to use the "Cisco AnyConnect" application.
Use
This VPN application will let you connect to Drexel's network when you are off-campus, and helps you access Drexel online resources.
- Open the "Cisco AnyConnect" applications from the "Applications" folder on your Mac.
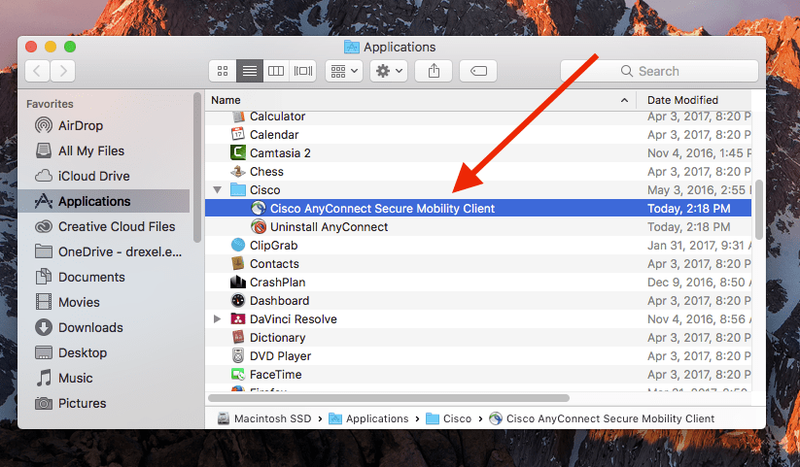
- Enter "vpn.drexel.edu" (without quotes) in the provided text box, and click "Connect."
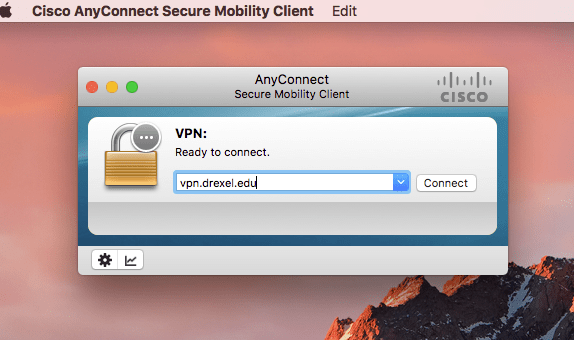
- Enter your DrexelOne username and password, and click "Connect."
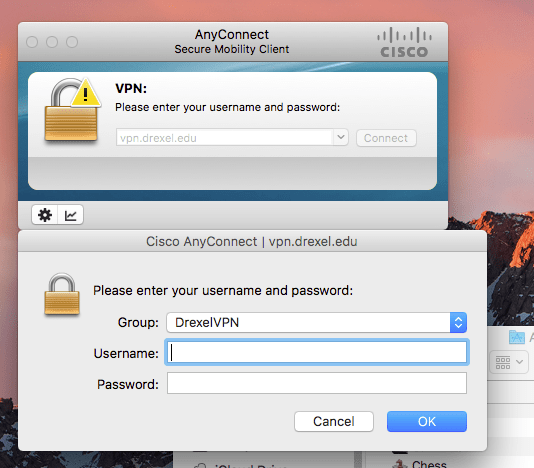
- IMPORTANT NOTE: The VPN app may say "Login failed" until your approve MFA if you use an Authenticator app.
- Use your Drexel Multi-Factor Authentication of MFA method to "Approve" the connection (or press # when called on the phone).
Drexel's VPN new requires Mutli-Factor Authentication or MFA.
Once you login to the VPN, and click "Connect," answer your phone, and press the # sign. Or press "Approve" in the Microsoft Authenticator App notification (unlocking your phone may be required).
To set-up MFA, or change to the Microsoft Authenticator App
(especially if you travel outside the U.S. and wish to avoid excessive call or data roaming charges),
see the following webpage.
Microsoft Multi-Factor Authentication (MFA) - Within 30 seconds, you should see the "AnyConnect" icon with a tiny lock image on it appear in the upper right of your Mac's computer display.

You may also see a window saying you are connected.
If you do not, and want a 2nd way to verify you are connected, open the "Cisco AnyConnect" application from the "Applications" folder on your Mac to see this window.
There are 2 images below.

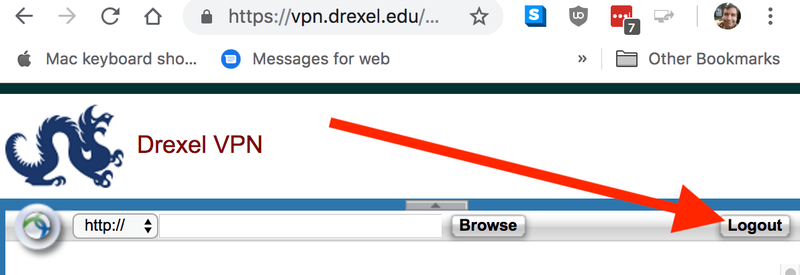
- Click the "Logout' button on the https://vpn.drexel.edu webpage open in your web browser.
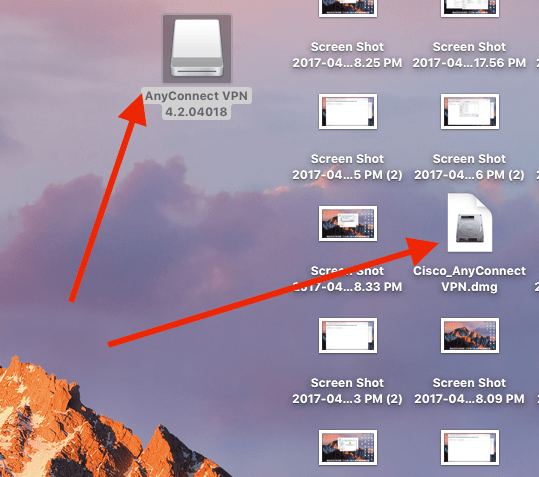
- Eject the "AnyConnect VPN" drive on your Mac computer desktop. Then delete the "Cisco_AnyConnect_VPN.dmg" file from where you saved it.
To eject a drive, right-click/control-click the drive and select "Eject..."
To delete a file, right-click/control-click the file, and select "Move to Trash." Or drag the file to delete to the "Trash" can.
You may have saved the "Cisco_AnyConnect_VPN.dmg" file somewhere other than your Mac computer desktop.
Cannot Install Cisco VPN because Cisco VPN Already Installed
On rare occasions, someone will install Cisco VPN, and get an error message that Cisco VPN is already installed.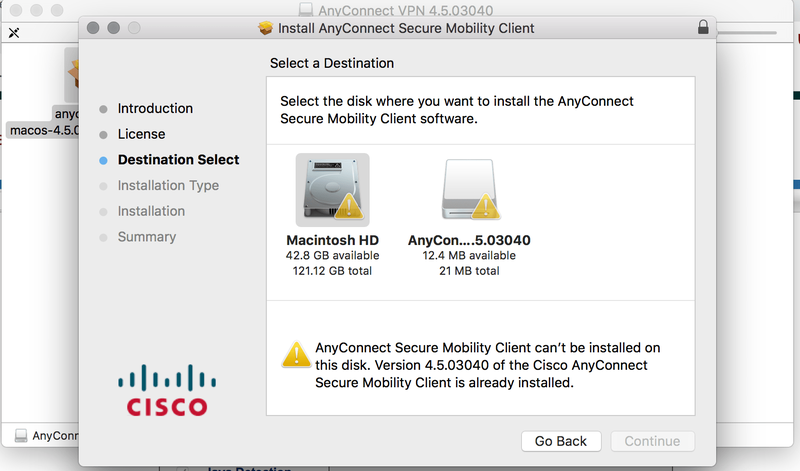
First, try the Cisco VPN application in your Applications. If your current Cisco VPN application still works, use that.
If your current Cisco VPN application does not work, and you cannot install another because you are told it is already installed, do the following:
- In the "Cisco" folder in your "Applications" folder, open and run "Uninstall Cisco AnyConnect."
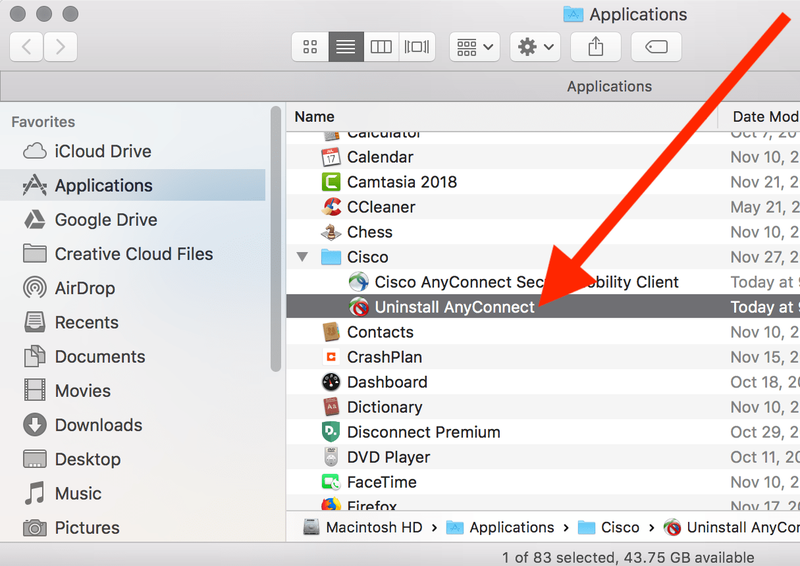
- Follow the onscreen instructions.
If you are told Cisco AnyConnect successfully uninstalled...
- Follow the Cisco AnyConnect installation instructions at the top of this webpage.
If you are told again that you cannot install because Cisco AnyConnect is still installed:
- Go to Applications > Utilities > Terminal.
- Or find "Terminal" in a Spotlight search by pressing the Command + Spacebar, or Cmd + Spacebar, or ⌘ + Spacebar keyboard keys simultaneously.
- Type in the following command at the prompt:
sudo /opt/cisco/vpn/bin/vpn_uninstall.sh - Enter your Mac password.
- Once the command finishes running:
Follow the Cisco AnyConnect installation instructions at the top of this webpage.
Problems using Java with VPN Connected
If you have problems using Java with VPN connected, you'll need to open the Java Control Panel's Security tab and configure it to allow the Drexel VPN. Here's how.
- Open the Java Control Panel
Windows 10 instructions: https://www.java.com/en/download/help/win_controlpanel.xml
Mac instructions: https://www.java.com/en/download/help/mac_controlpanel.xml
See the following screenshot for how to set the control panel to allow Java access in a Drexel VPN session.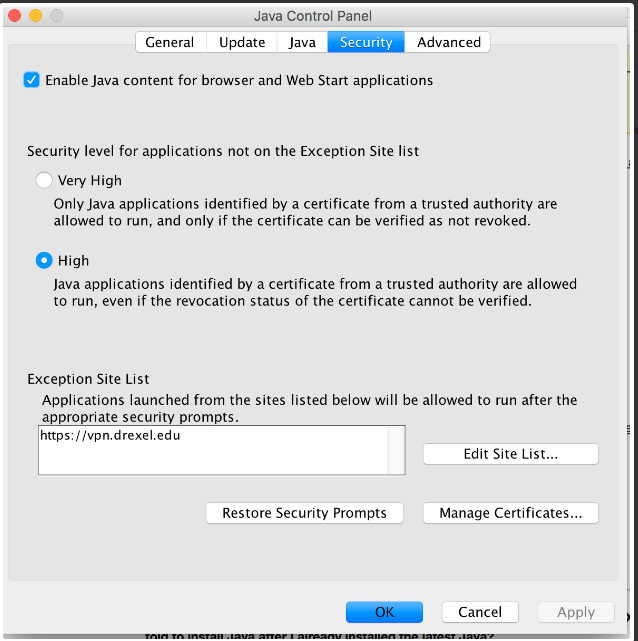
Why Not Use Self Service for Mac?
If you have Self Service for Mac installed (which all instructors and staff with Macs should), you can definitely install the Cisco AnyConnect VPN application from there easily while on-campus at Drexel.
However, off-campus users must first connect to the Drexel network using the Cisco AnyConnect VPN client to use Self Service for Mac to install the Cisco AnyConnect VPN client. It's a classic paradox or catch-22.
To avoid that, the instructions below explain how to install the Cisco AnyConnect VPN client without using Self Service for Mac.
Note that the Cisco AnyConnect VPN client updates itself when it first connects.
Troubleshooting Tip
If you re-installing Cisco AnyConnect and need to delete the previous application , follow the direction listed here to properly uninstall Cisco AnyConnect from MAC:
If the Cisco AnyConnect application doesn't work on a Mac (especially macOS X Mojave), run this command in terminal:
sudo chmod 777 /private/tmp
Then close and re-open Cisco AnyConnect, and try again.
If it still does not work, try a reboot.
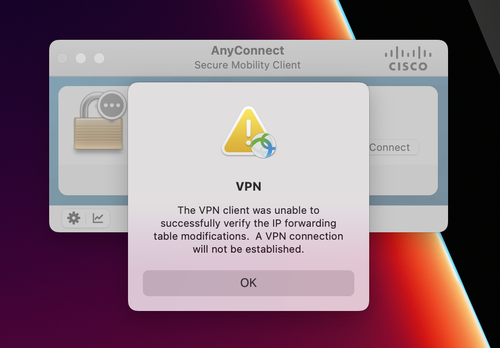
Unable to successfully verify the IP forwarding table modifications error!
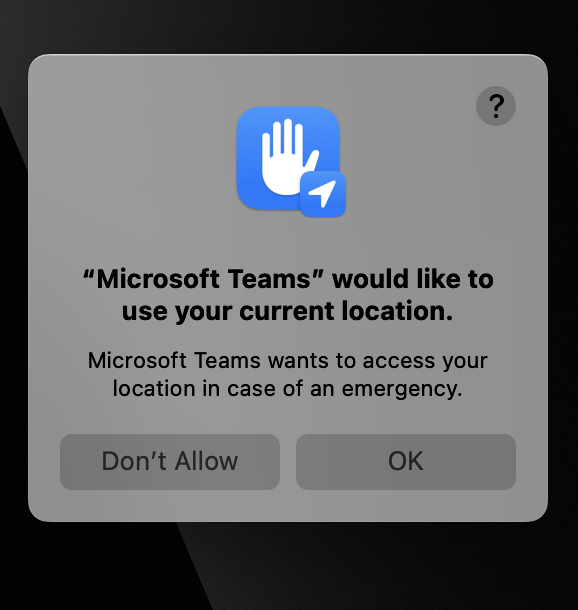
If you experience this issue, please close all applications and then attempt to reconnect to the VPN. You may see pop-ups from other apps requesting location services, as shown in the images below. Just close all apps before reconnecting.
