
Changing DNS - Use Drexel DNS Resolver or Default DSN Resolvers
If you are using Cloudflare, Quad9, or some other DNS resolver, you will likely have issues using Drexel network resources. ALSO NOTE: Drexel has disabled split tunneling and forced DNS override, meaning you cannot bypass once you connect to the Cisco Local Client, meaning your choice of DNS resolver choice won’t matter once on VPN. However, once off Drexel VPN, your choice of DNS resolver will be restored.
Drexel DNS
144.118.27.33 and 144.118.27.50 are the DNS addresses for Drexel. But letting your computer automatically detect this is usually best for on-campus network resources.
Refer to the directions above to change the DNS on your MacOS or Windows machine.
Do this on machines that stay on Drexel campus only.
Resetting Network Settings to Default (Windows)
- Be READY to take a SCREENSHOT of your DNS addresses, should you need them again.
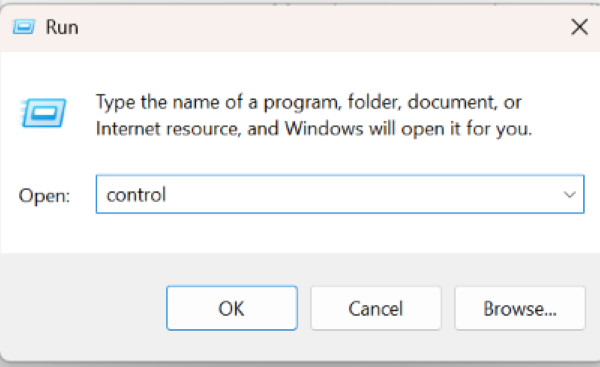
- Open up Control Panel. The shortcut for this is Win + R, and typing "Control."
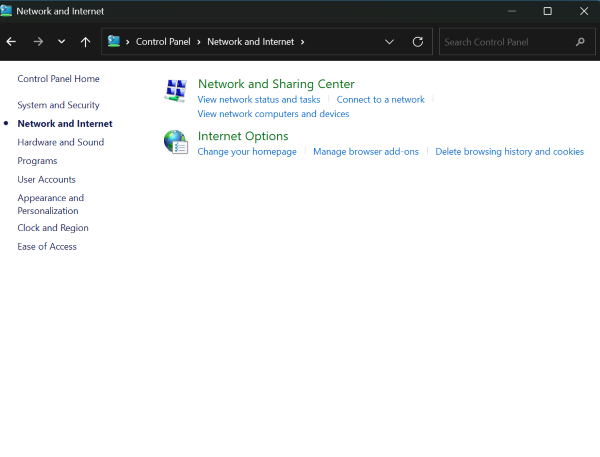
- Select Network and Internet, then click on Network and Sharing Center.
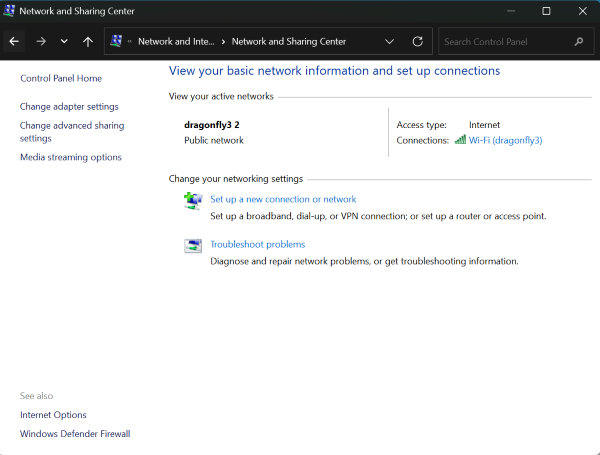
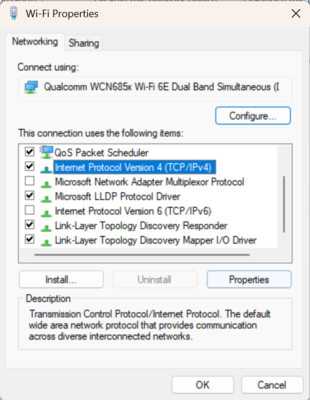
- Click on "Change adapter settings."
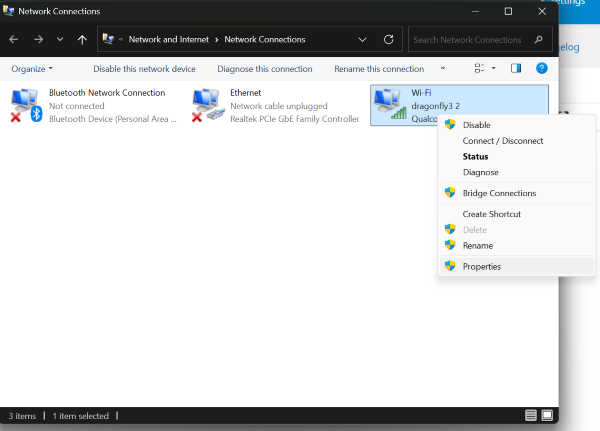
- Right-click on the network adapter that is currently in use, and select Properties.
- Select Internet Protocol Version 4 (TCP/IPv4), and select Properties
- Confirm that the IP address configuration is set to be obtained automatically.
If NOT, take a SCREENSHOT of your DNS addresses, should you need them again.
THEN select the options to Obtain an IP Address and DNS server automatically.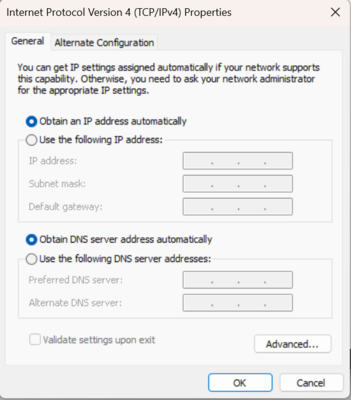
- Click OK to save your changes.
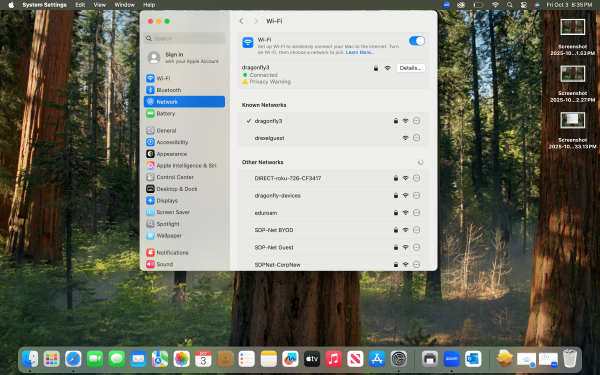
Resetting Network Settings to Default (Mac)
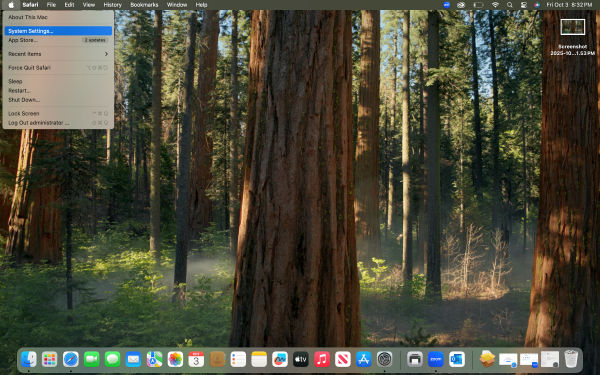
- Click the Apple menu in the top-left corner. Open up System Settings.
- Select Network
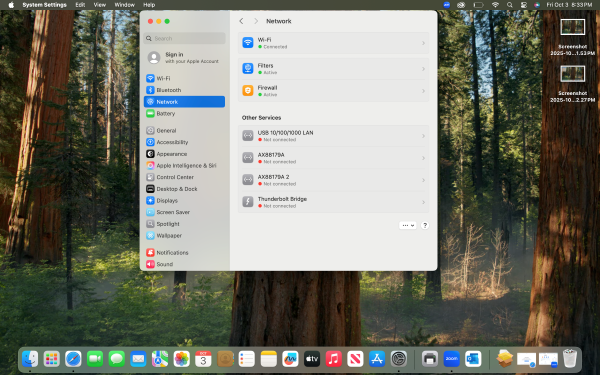
- Select the network adapter currently in use
- Click details and go to the DNS tab
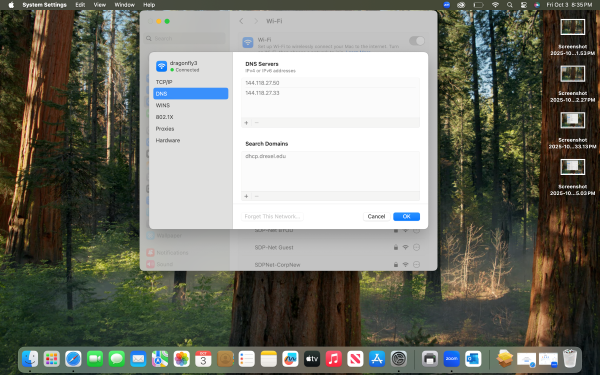
- Check the list of DNS servers.
If NOT, take a SCREENSHOT of your DNS addresses, should you need them again.
Then remove any custom DNS addresses by clicking the minus (-) button.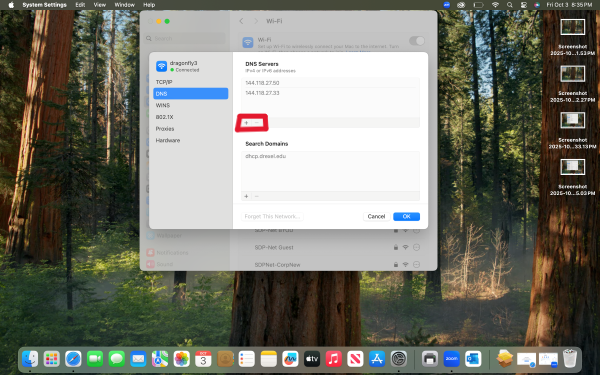
- Click OK to apply the changes.
Flushing DNS cache on Windows
Sometimes you will need to flush/delete DNS cache on your device to help with connection to Dragonfly3
- Open Command Prompt
- Type in the command 'ipconfig/release' and press Enter.
- Then Type in the command 'ipconfig/renew' and press Enter
- Then Type 'ipconfig/flushdns' and press Enter.
- Restart your device once all these commands are executed.
Flushing DNS cache on Mac
- In your Mac, open the Terminal.
- Type in the following command 'sudo dscacheutil -flushcache' and press Enter
- Then type in the command 'sudo killall -HUP mDNSResponder' and press Enter
- This should clear your DNS cache on Mac and should allow you to connect to Dragonfly3.