DaVinci Pro 3D Printer
HARD TO USE
Not impossible. But hard.
Printer Info
Brand: XYZ
Model: DaVinci 1.0 Pro
Filament Type(s): PLA
3D Filament Spool Specs:
More Specifications: https://www.xyzprinting.com/en-US/product/da-vinci-pro
Software: XYZ Suite (You will only need XYZ Print for printing)
How to Print
Before Printing
- Stick the Blue Bed Tape onto the print bed
- Replace the tape as it is worn out
Setup (First Time User Only)
- Open XYZ Print.
- Click "Select Printer."
- Select Color Series -> Da Vinci 1.0 Pro
- Click Apply
Printing
- Open XYZ Print
- Import ".stl" files.
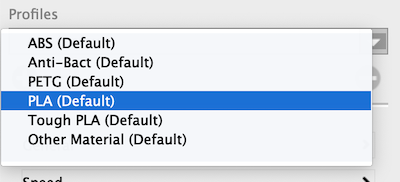
- From Profiles, make sure to select "PLA (Default)."
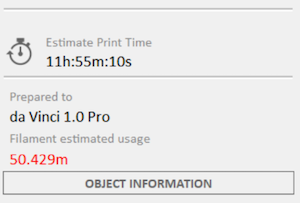
- Click "Prepare."

- You will see the filament estimated usage and estimated print time.
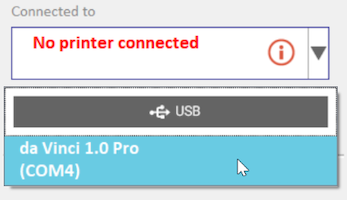
- Connect the printer & the laptop with a USB cable.
- Make sure the "da Vinci 1.0 Pro" show up in "Connected to."
- Click "PRINT."

How to Change/Replace Filament
Loading Filament
- From Home Menu.
- Go to Utilities -> Change Cart -> Load Filament.
- Open the top cover.
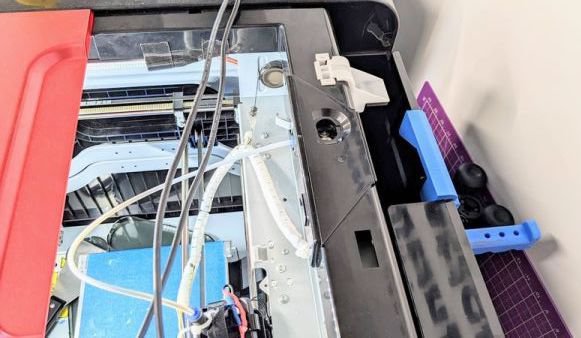
- Insert filament into the feeder gear.
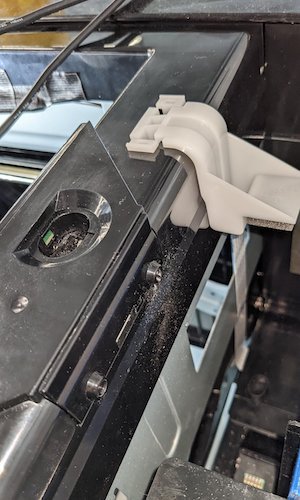
- Filament is past the point the feeder gears can do anything with it.
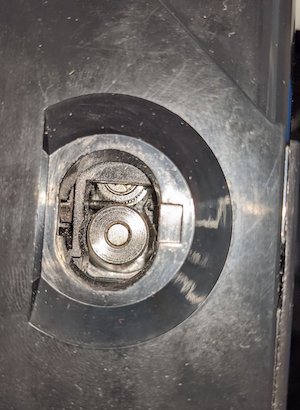
- Activate LOAD FILAMENT function on the printer.
Then, press OK > Apply Settings, then OK.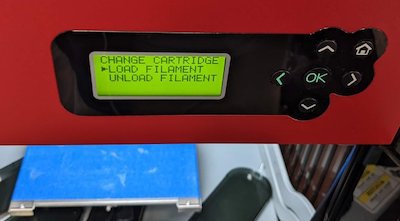
- Wait for the extruder to heat up.
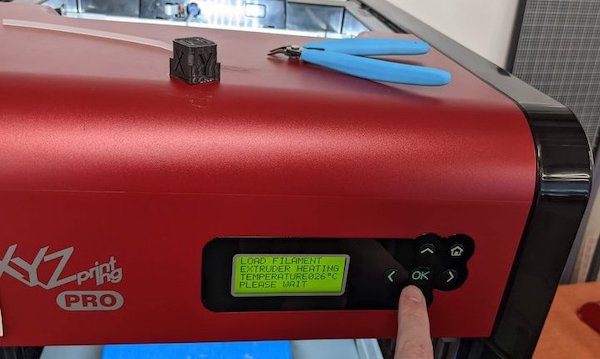
- While
the temperature reaches the operating setting, the printer loads the
filament automatically, and filament loading is completed
- Check if the filament flows out from the nozzle
- If the filament has flowed out, please press "OK" to complete the loading process
Unloading/Replacing Filament
- From Home Menu
- Go to Menu -> Utilities -> Change Cart -> Unload Filament
- Wait for the extruder to heat up to operating temperature
- When "PULLOUT FILAMENT" is displayed on the screen, press the release arm and pull out the filament
- Remove the filament spool from the holder and replace a new one (behind the 3D printer)
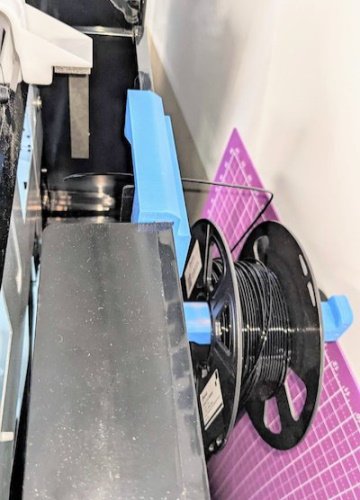
- Then follow the Loading Filament instruction above to load the filament
Still Not Loaded?
- If the filament is not fully loaded, meaning it is not in the extruder
- You can simply push the black latch near the filament hole and pull the filament out
- Otherwise, follow the next instruction to unload the filament
In most cases, the filament will be stuck in between the plastic tubing and the actual extruder.
See how the filament isn't feeding into the metal funnel top hole within the extruder in the picture below?
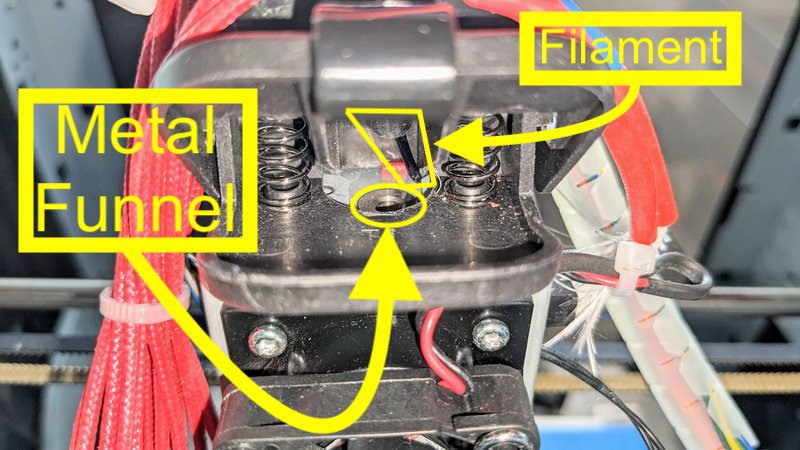
In order to fix this, you'll need to cut the filament by lifting up the black tab above the extruder.
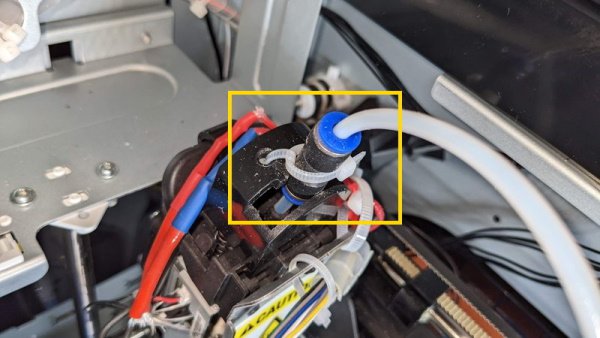
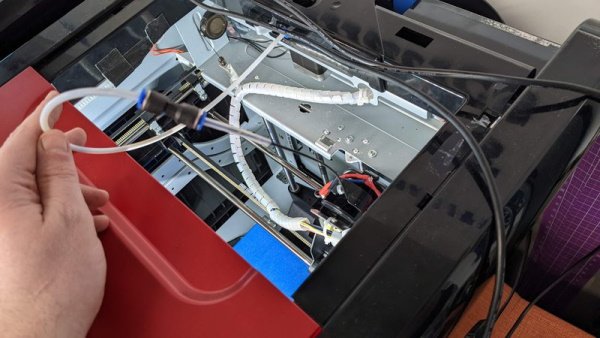
The
black & blue push fitting is zip-tied to another zip tie to hold it
to the black plastic top of the extruder mount. White PVC tube feeds
into the push fitting, and the 3D filament goes through the tube,
through the push fitting, into a smaller PVC tube, and down into the
extruder mount and into the extruder
- Shut off the printer and unplug the wires going into the extruder
- Top
zip tie cut that connected to other zip tie connected to black plastic
on top of the extruder. You can pull the tubes connected on either side
of the black & blue push fitting and you'll see the filament (black
filament here) that was in the tube. This filament can't be pulled out
by hand... yet. There's a melted and now cooled glob of filament at the
bottom preventing you from pulling it through.
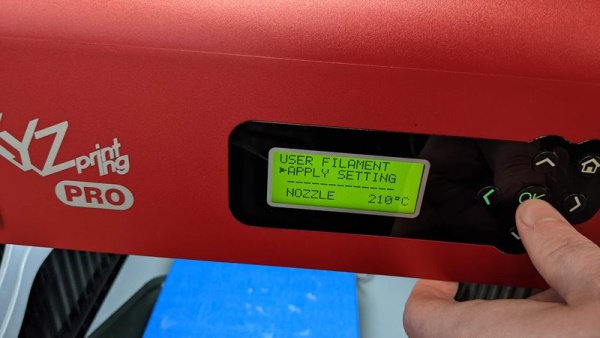
- Use the Load Filament option to get filament that won't pull out, well, pulled out. Go to Utilities, then press OK > Change Cart, then press OK > Load Filament, then press OK > Apply Settings, then press OK
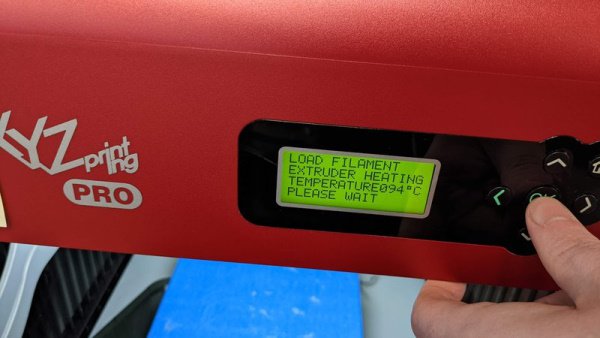
- The extruder will be heating up in Load Filament Mode
- Once
the Temperature gets around 150 C, grab the 3D filament that you cannot
pull out of the extruder and push the 3D filament back down into the
extruder for a half-second and then pull back on the 3D filament back
from the extruder for a half-second. Keep repeating the pushdown &
pull out.
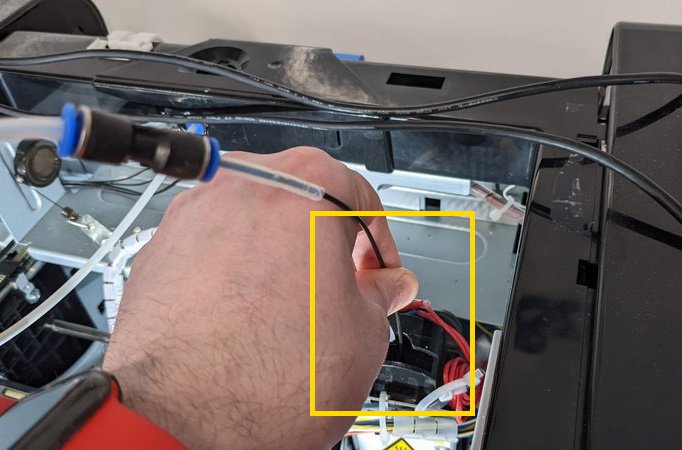
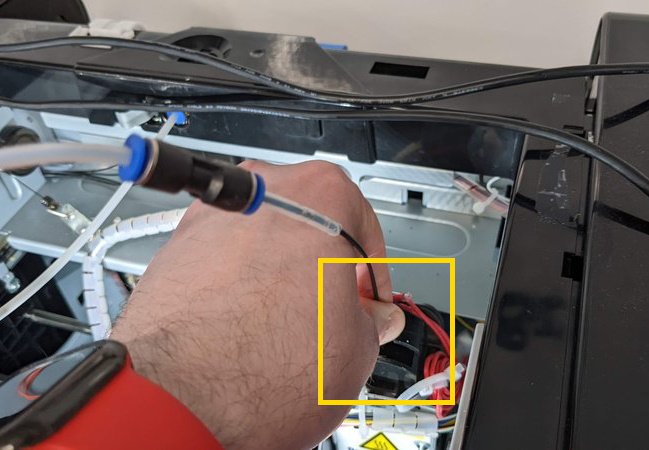
- You'll
feel the filament go down a little more than normal (usually) and/or
then be able to pull the filament out again. Filament out here.
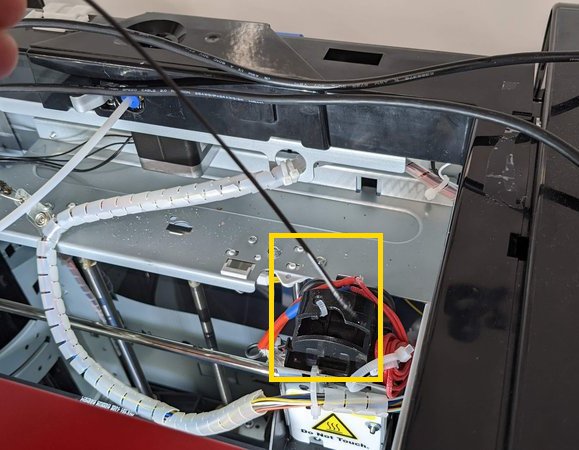
- Remove the 3D filament from the tube
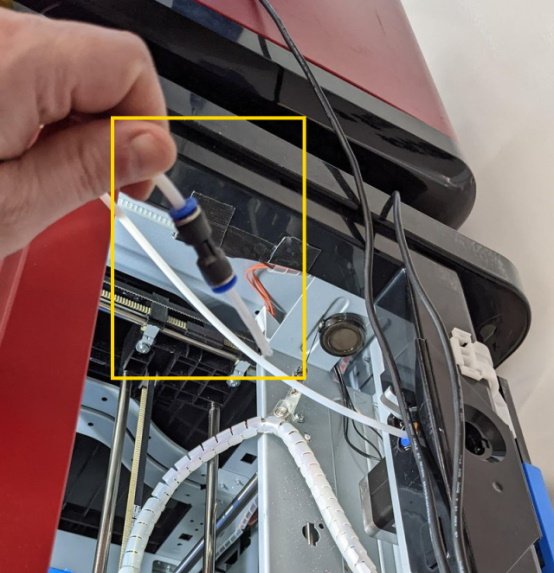
- Stop the Loading by pressing OK. Takes a lot of pressing. Sometimes doesn't stop until function time is over on DaVinci printer
- Do not keep the filament fitted through the blue spool holder like this, before or after changing the filament.
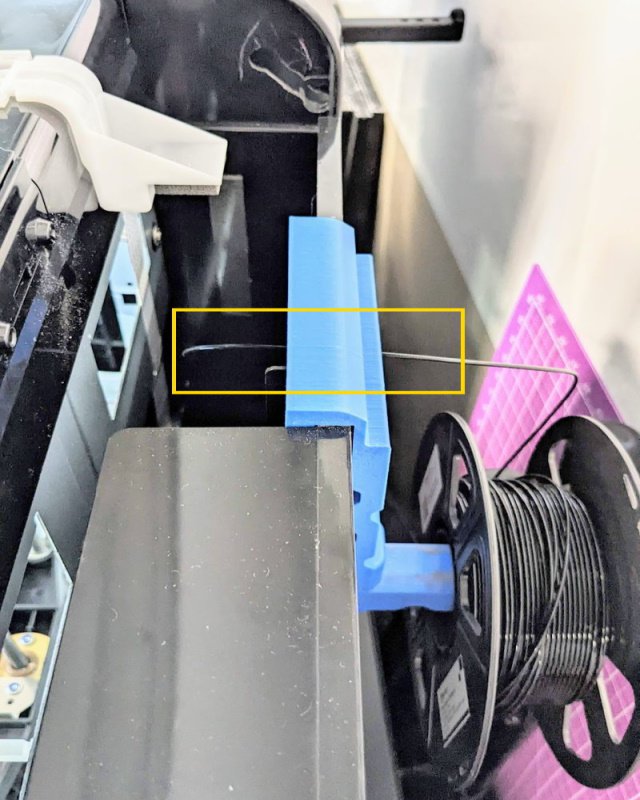
- Removed
the blue filament spool holder from back. You have to twist the
filament a certain way to get it through hole to the gears, through the
gears, press the metal gear release, and through the hole to the white
tube. It helps a lot to cut a 45-degree or more acute angle on the end
of the filament.
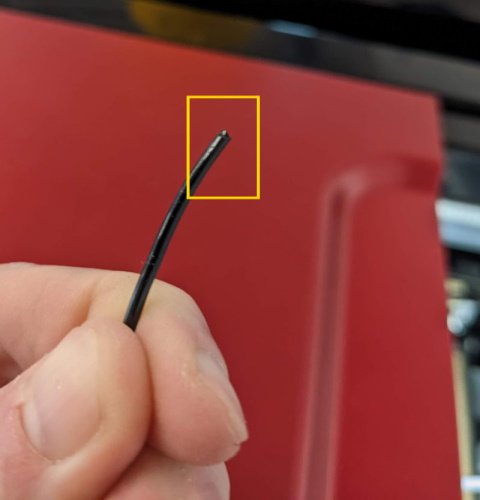
- Got 3d filament about 1 inch into the white PVC tube
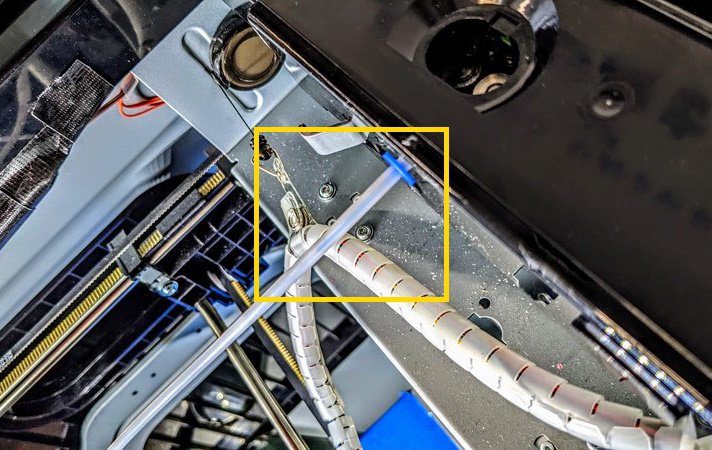
- 3D filament all the way through the tube
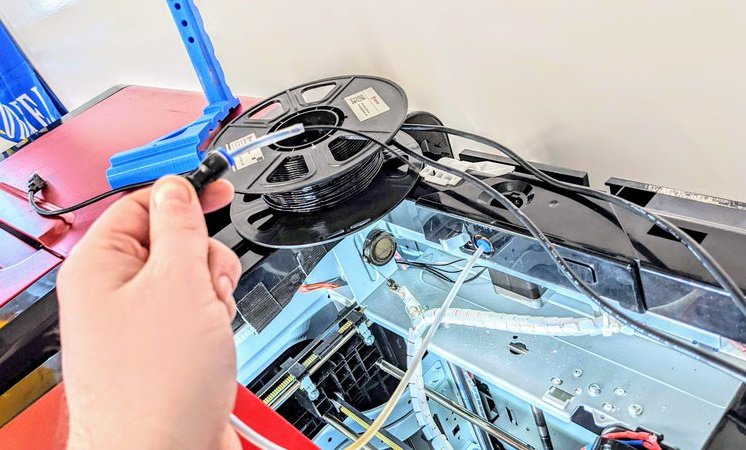
- 3d
blue filament spool holder placed to the side of large hole. Do NOT
feed through spool holder hole. Constrains filament too much when you
try to twist the 3d filament to get it in.
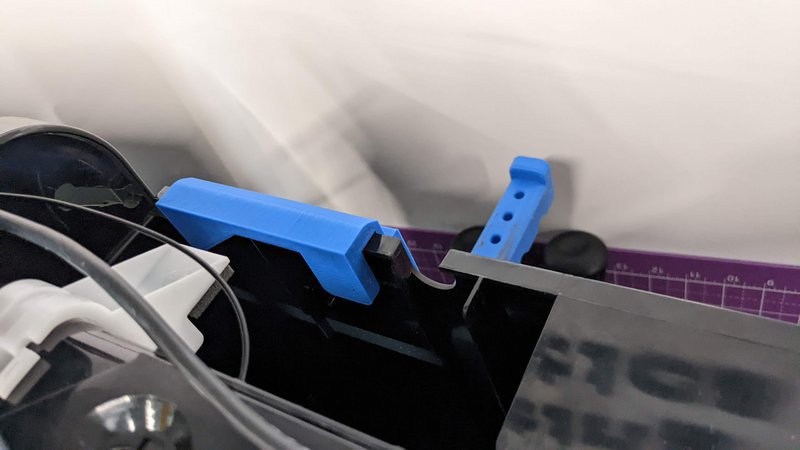
- 3d filament is being reinserted into the extruder again, but often gets stopped because the filament gets stuck off to the side
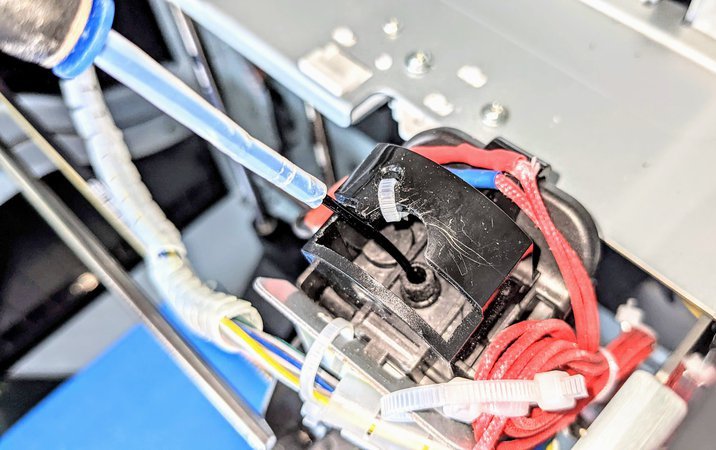
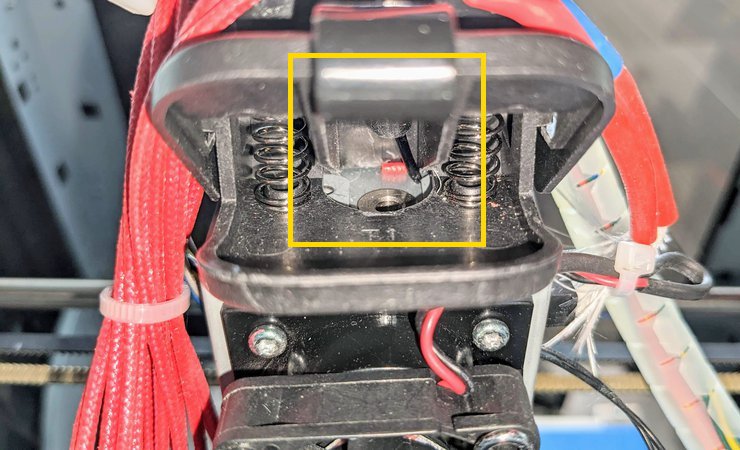
- So use something to guide the filament into the metal hole.
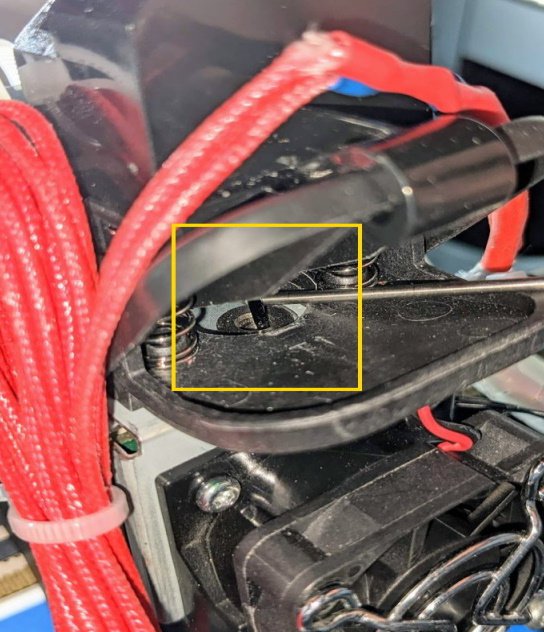
- Zip tie the push fitting to the other zip tie attached to the top hole of the black plastic of the 3d extruder mount.
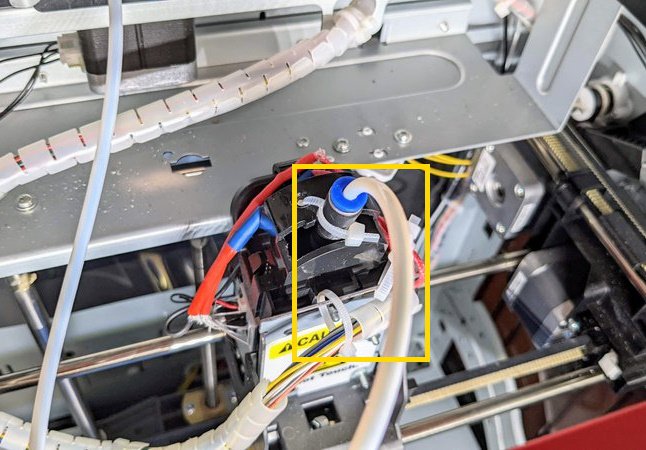
- Move
the extruder and extruder mount to the position shown here before
starting the print (or even using the Loading position after reloading
the filament).
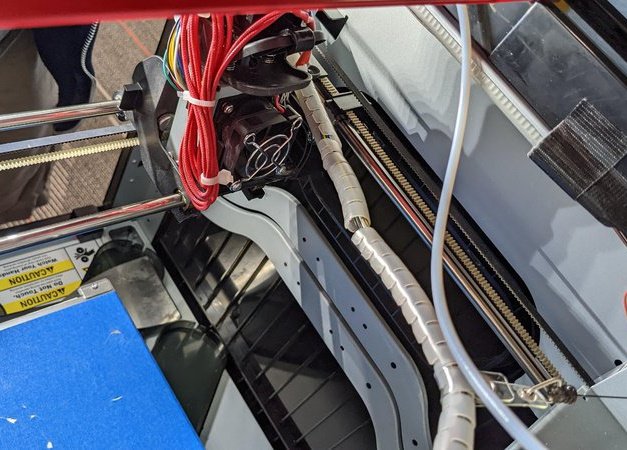
- Now run the Load Filament option again. No to Utilities, then press OK > Change Cart, then press OK > Load Filament, then press OK > Apply Settings, then press OK.
Calibrating
- Use
the filament clippers to trim the nozzle of any dried or hardened 3d
printer filament. May want to use the wire brushes on the nozzle. No
need to remove the nozzle or extruder from the mount or 3d printer.
- Use
the Z-Index function first on the printer, with a folded over sheet of
printer paper, and put the nozzle over each screw, starting with the
front screw, then left-back, then right-back, then just in the middle.
You want the folder piece of printer paper to move easily between bed
and nozzle but otherwise the bed and nozzle to be as close as possible.
And the paper should move with no snagging or effort.
- For
this first go-around, use the Z-index function to move the nozzle and
bed closer or farther from one another. With the Z-index function, the
up arrow moves the bed down. Down arrow moves bed up.
- For
the center of the bed, don’t make any adjustments unless the paper snags
at all. If it does, make adjustments, but do all 3 screws using Z-index
again, and *then* go onto the next step.
- Now,
you’ll adjust the distance between the bed and nozzle again over each
of the 3 adjustment screws under the bed, and the center of the bed,
using the folded over piece of paper again to gauge the distance between
the bed level and the nozzle, but now, you’ll use the white wing nuts
on the 3 screws under the bed. Start with the front, then do back-left,
then right-left. Right-tighty (if looking down over the bed) on the wing
nut makes the bed go up. Left-loosey (looking down over the bed) makes
the bed go down. You want the folded sheet of paper to move smoothly
without snagging at all between the bed and the nozzle, but only just.
Do this over each of the adjustment screws, using the white wing nut of
the screw to make the adjustment.
- Again, when you gauge the
center of the bed, you just want the piece of paper to move freely.
Don’t tighten anything if the paper moves freely when gauging the
center. But if the paper snags, repeat all of this.
- A great file to do a test print after calibration is the “Retraction Test” at https://www.thingiverse.com/thing:909901
Troubleshooting
Tearing Build Tape
- Expect it. Accept it. Try not to rip it. Be patient as you use the scrapers. But it’ll rip.
- When it does, gently try to straighten the crunched-up tape, to flatten it and pull it back over the whole.
- And
use the spatulas to flatten it (swipe towards you with the blade down
on the surface, or swipe in the opposite direction of the tear with the
blade down). This can work great to really flatten the tape and get some
more prints in before changing it.
- If you have 1 hole
larger than an inch in diameter, you have to change the bed tape. If
you have 2 holes larger than 0.5 inches in diameter, you have to change
the bed tape. And we mean holes you can’t flatten the tape over again.
3D Print really stuck to build tape?
- Find a small thin piece of the 3d print and gently but firmly get the spatula under the top of the thin piece.
- Go slow! But firm. Try to feel when you are tearing. You can repair little tears (and re-repair frequently) by pulling scrunched bed tape back over the tear. Big tears are harder to repair.
- No small thin piece of the 3d print? Use the corner of the spatula blade and wedge it back and forth under one of the ends of the 3D print.
