Printing at CCI Commons -- Windows
Windows 11 Instructions
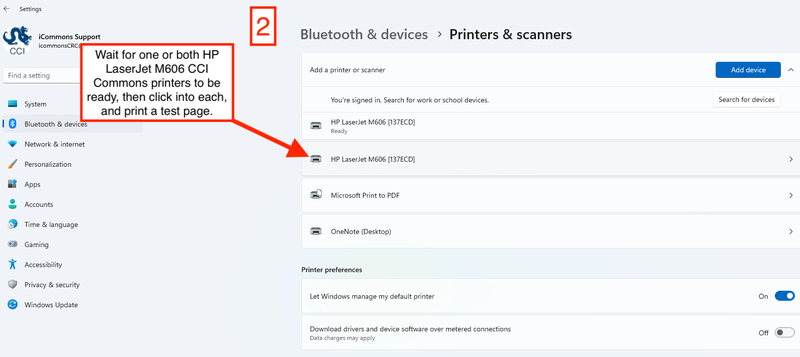
- Go to Settings and navigate to Bluetooth & devices then Printers & scanner

- Add the two HP LaserJet M606 printers
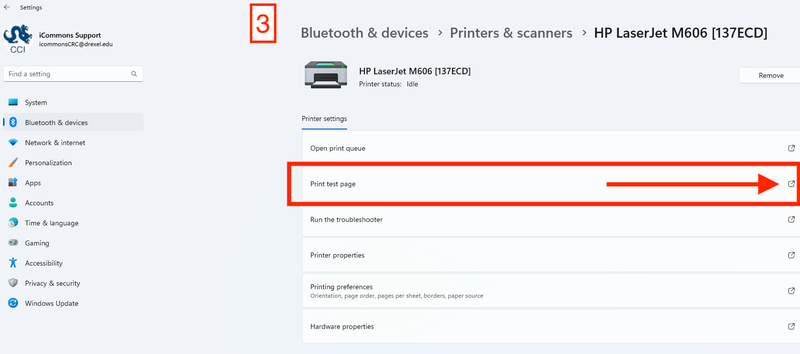
- Print a test page once the printers are added
OLD Instructions
- Go to Settings and navigate to Bluetooth & devices then Printers & scanners
- Click "Add device" then wait until it shows "The printer that I want isn't listed" and click "Add manually"

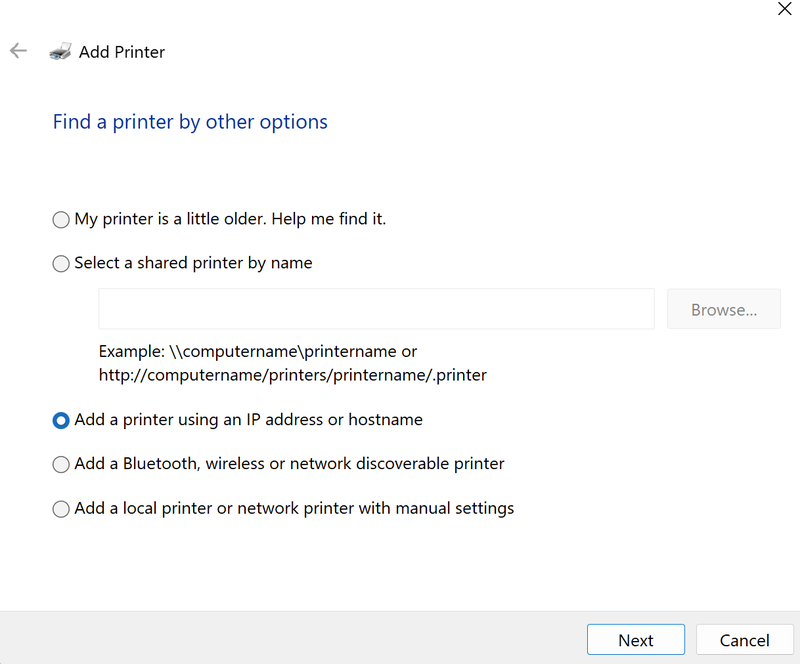
- Click "Add printer using a TCP/IP address or hostname" then click next
- Enter "ccicommonsprint.cci.drexel.edu" or "ccicommonsprint2.cci.drexel.edu" as the hostname then click next
OR... use 10.248.127.206 or 10.248.127.167 (respectively with above hostnames).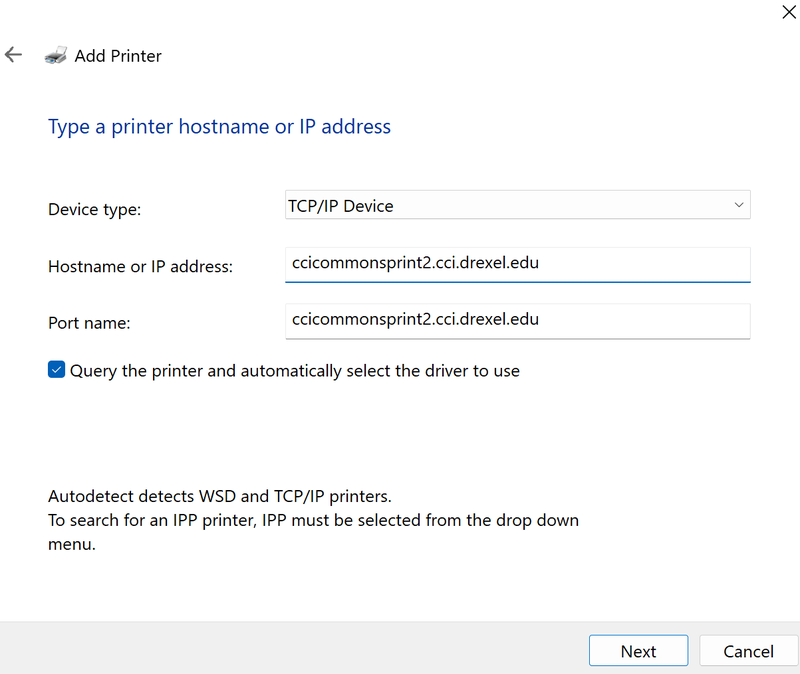
- Make sure Standard and "Generic Network Card" is selected then click next
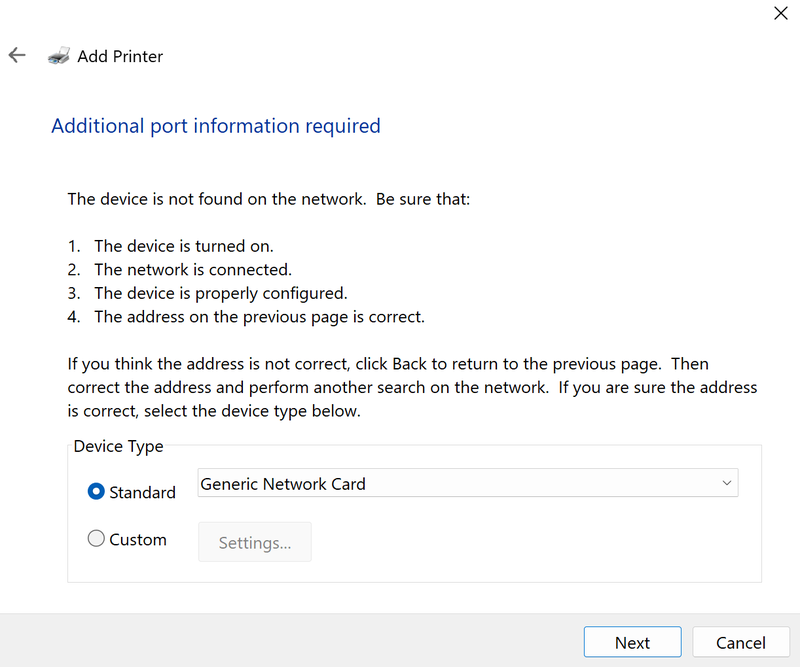
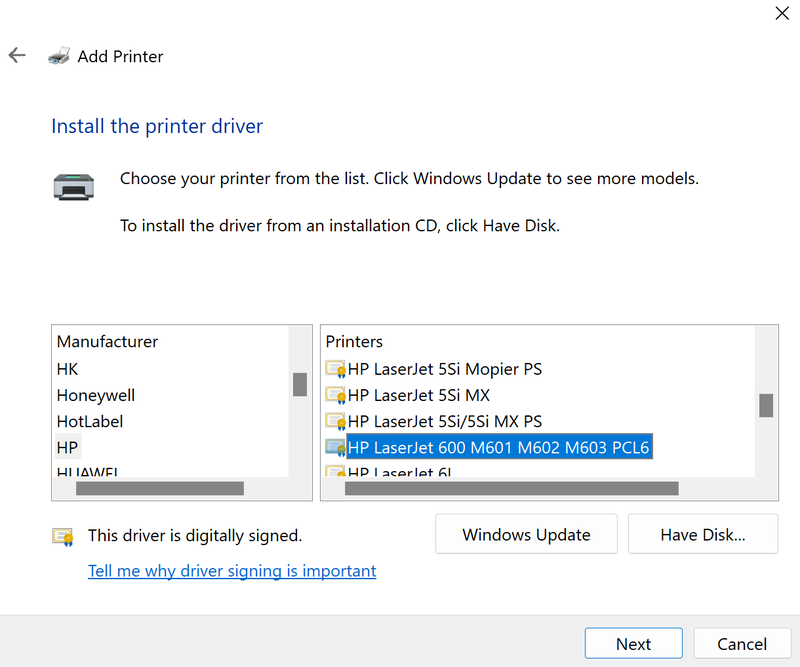
- Select "HP" under Manufacturer (on left side) and "HP LaserJet 600 M601 M602 M603 PCL6" under Printers
a. If either are not there, you can do one of two options.
1. Do "Windows Update" in the bottom right, which will take a few minutes.
2. Download and install the Windows 11 driver from
https://support.hp.com/us-en/drivers/hp-laserjet-enterprise-m606-series/7087300
Click "Have Disk..." and select the driver executable file.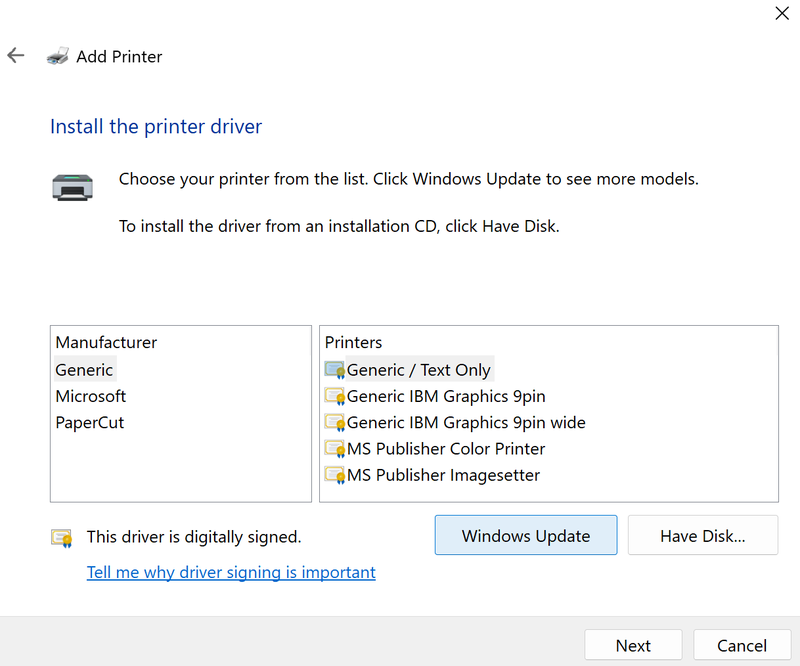
- Select "HP" under Manufacturer (on left side) and "HP LaserJet 600 M601 M602 M603 PCL6" under Printers then click next
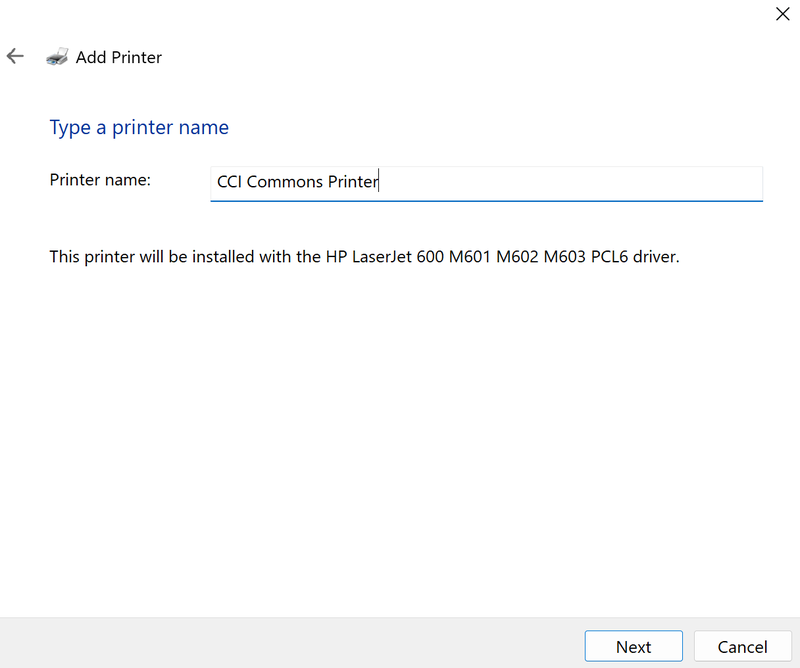
- Name the printer and click next
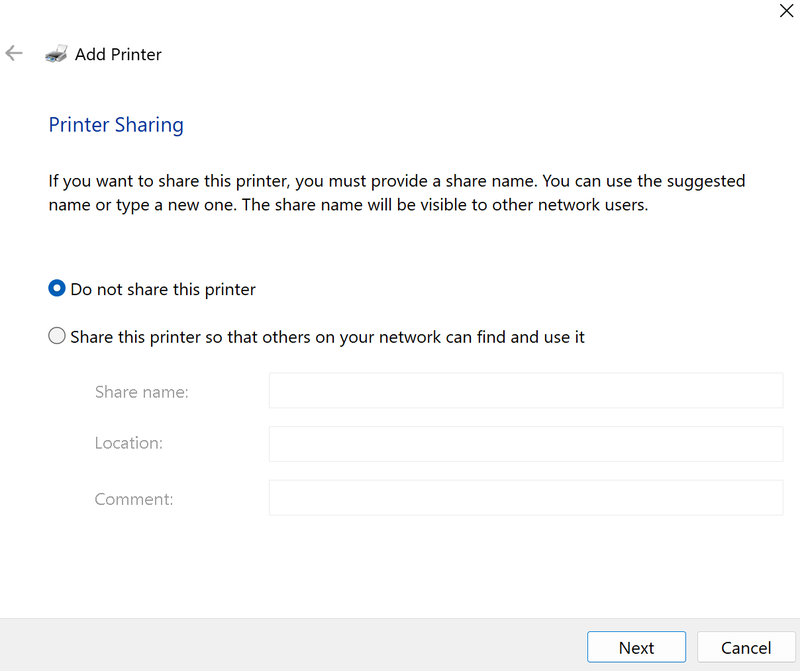
- Make sure that "Do not share this printer" is selected and click next
- It is recommended that you click "Print a test page" to ensure that the printer is connected properly
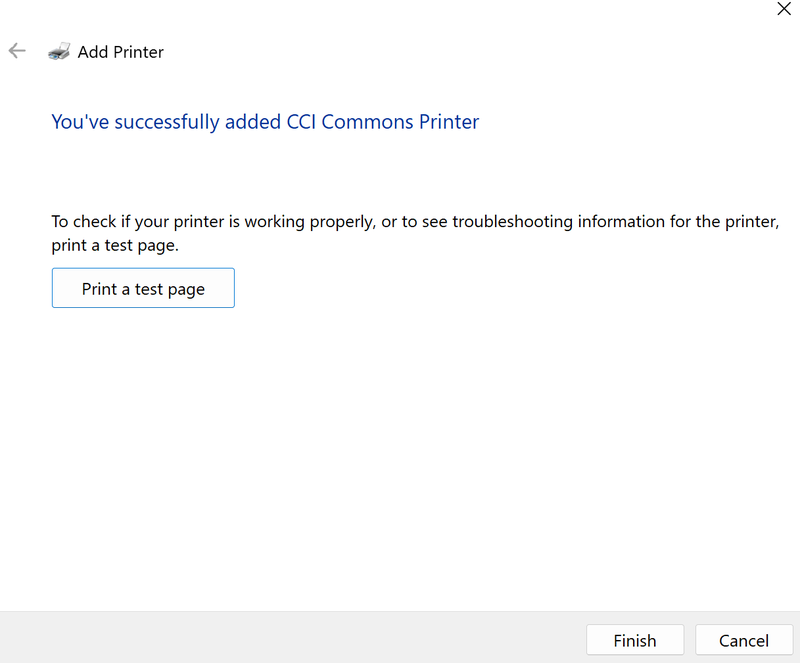
You are all set for Windows printing!
Please note that the CCI Commons Printers only have letter-sized paper. If you are a student and you need to print on paper of a different size, Westphal has paid printing in different paper sizes, although this is only available for people with card-swipe access. If you do not have access, please email ihelp@drexel.edu or ask a Student Assistant at the CCI Commons Helpdesk for help with printing on different paper sizes.
Troubleshooting
- Try updating Windows 10 drivers more thoroughly at Properly Update Windows 10 & Drivers in Windows 10.
- For single and double-sided instructions look at Printing Single and Double-sided in browser
- If you have any further questions, feel free to ask at the CCI Commons Helpdesk & a Student Assistant will be happy to help you get the printer added to your laptop.
- Also, questions can be emailed to ihelp@drexel.edu, if you are a CCI student, staff, or faculty member.
