Record Screen on iPad, iPhone, or iOS Device
There are a couple methods to record whatever you do on the screen of your iPad, iPhone, or iOS device, along with audio and additional video from your webcam.
Record Screen with Audio using the Control Center OptionAlternative video instructions at bottom of page, but take a look at written instructions & screenshot in step 1 below, as it may be helpful.
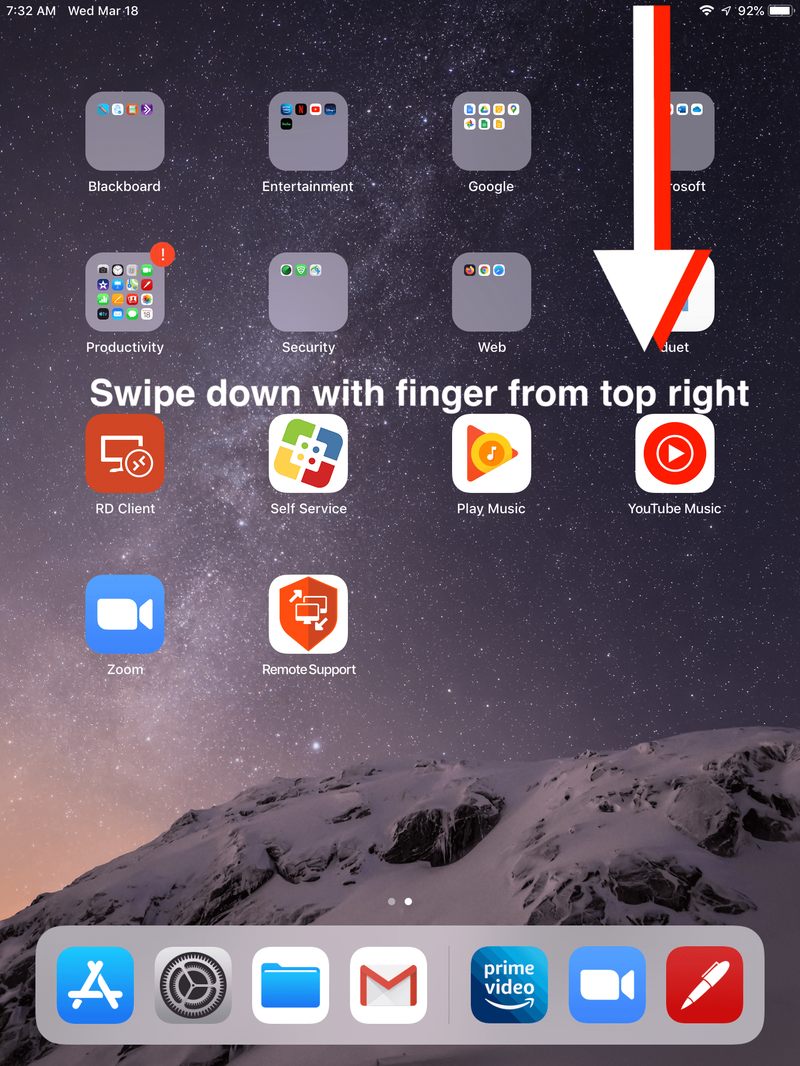
Swipe down from the top right on your iPad, iPhone, or iOS device.
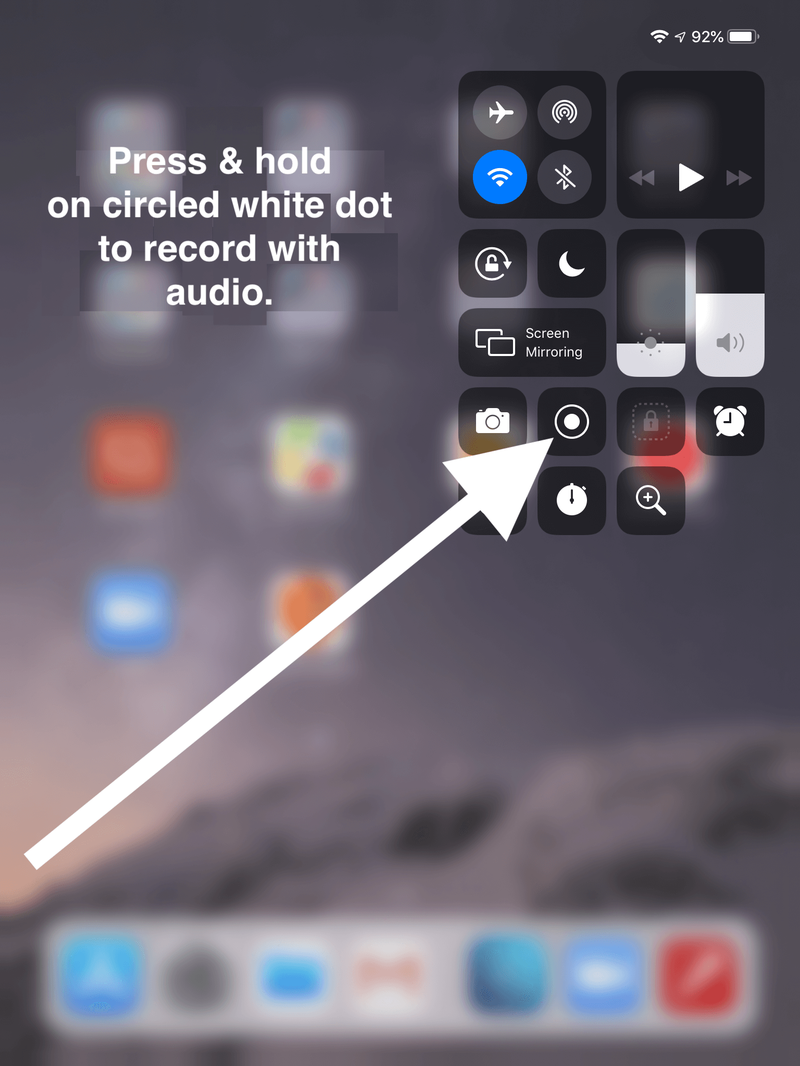
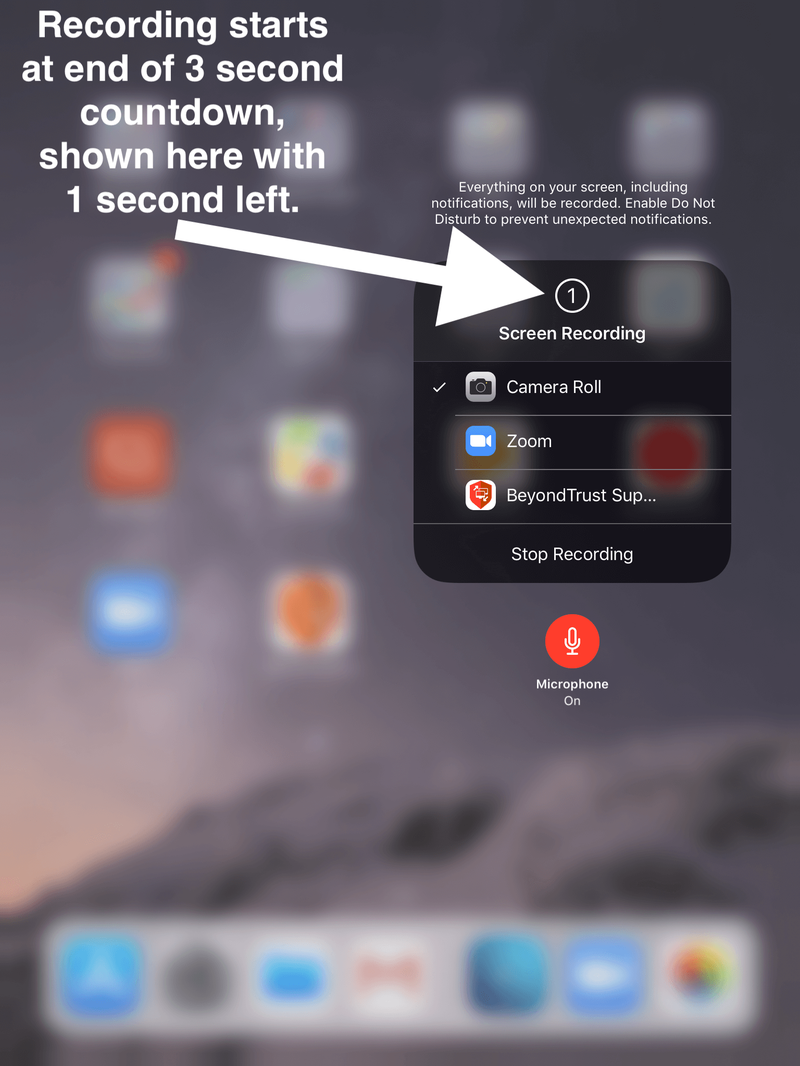
Click the white record button, or the circled white dot.
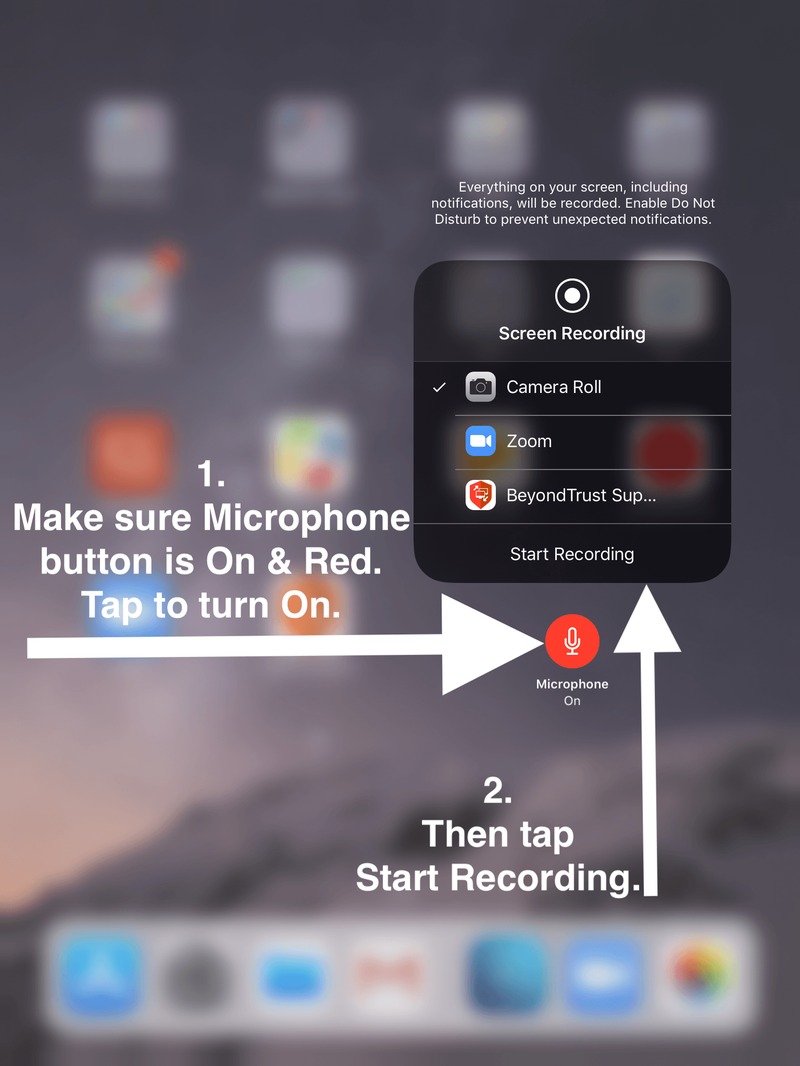
Make sure Microphone button is ON or Red. Tap to turn on.
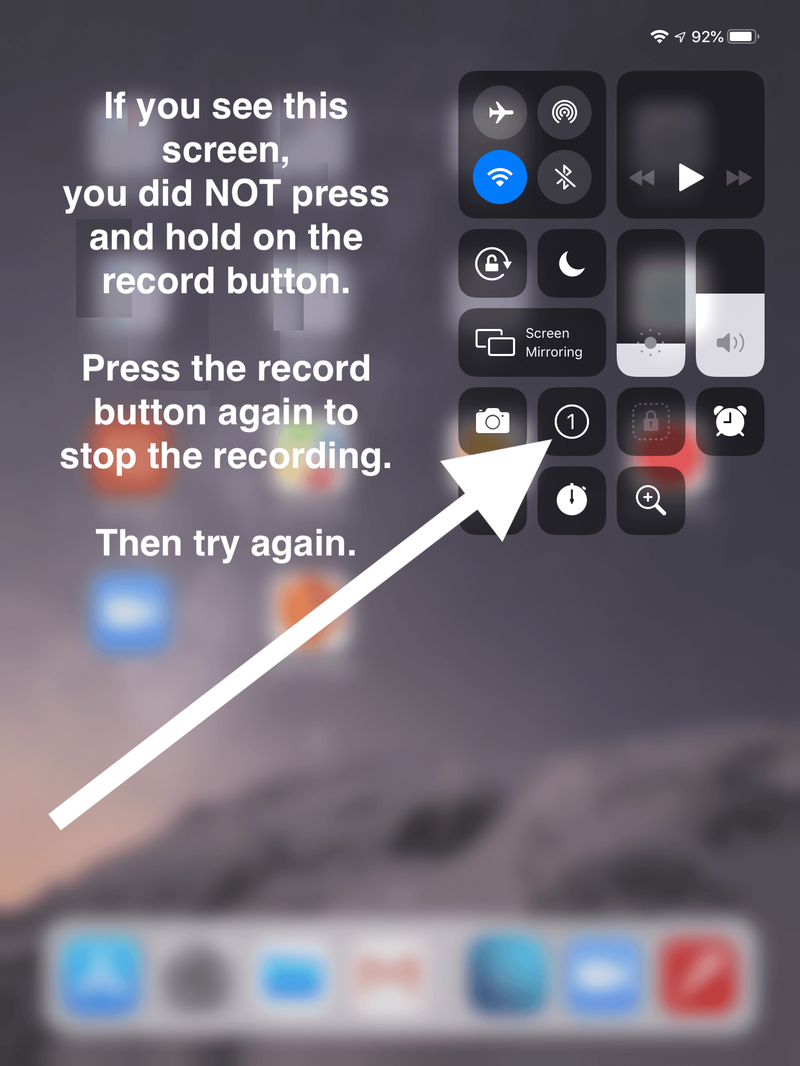
If you do *not see a Microphone button, you didn't press and hold the Microphone button. The recording will not have audio. Press circled red dot recording button again to stop recording and try again.
Wait for 3-second countdown.
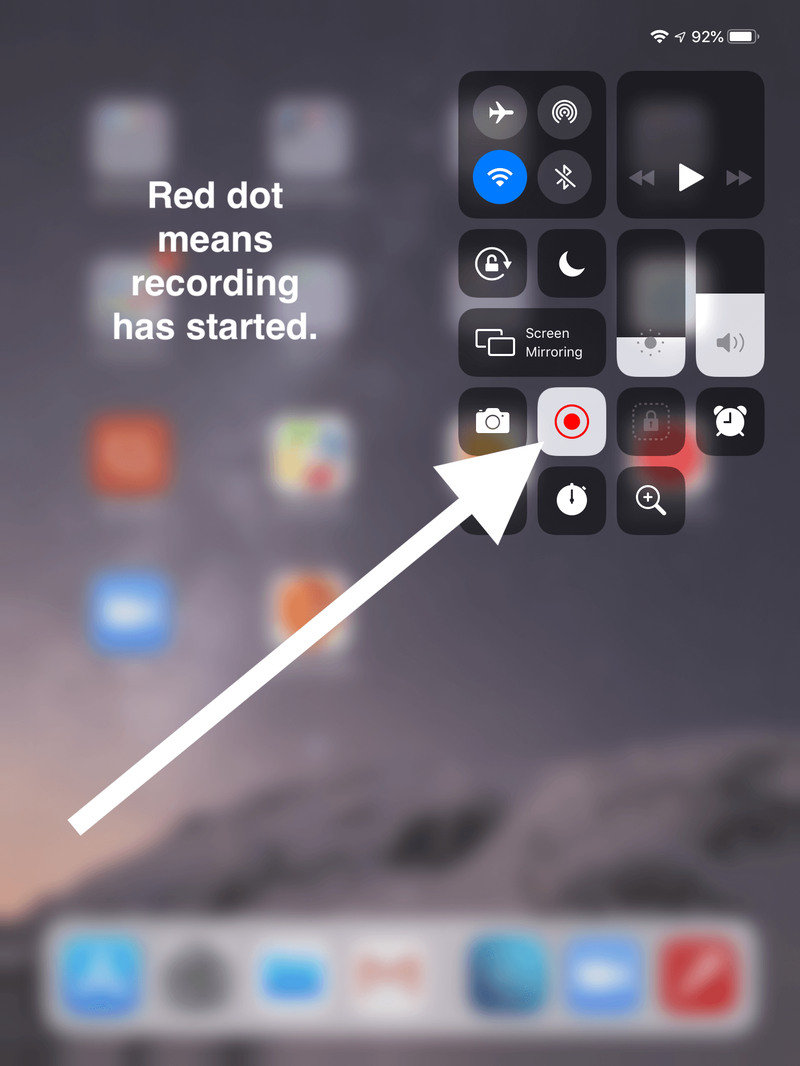
- The circled white dot will turn into a circled red dot.
That means the recording has started.
Press iPad/iPhone Home button. Or swipe up.
Navigate to the apps you wish to use in your recorded demonstration or presentation.
- To write/draw on your iPad or iPhone, see link below.
- Write or Draw on your iPad or iPhone or iOS Device
- Any app you have that you can write/draw with on your iPad or iPhone will work as well.
- To stop recording, tap red bar at top. Then tap "Stop Recording."
- The video will be uploaded to your Apple iCloud account on the Photos page.
- Apple iCloud Photos webpage
- To set-up iCloud on iPhone or iPad?
- To Download Video from iCloud to your Mac or Windows computer? See video below.
https://www.youtube.com/watch?v=b6gyiTyzWtA
Video -- Record Screen with Audio using the Control Center Option
https://www.youtube.com/watch?v=DaSFGZq_ycE
Troubleshooting
Older iPads
On iOS 11? See link below.
On iOS 10 and earlier? See link below for an alternative method for recording from your iPad or iPhone's screen.
