
Office 365 - Mail Merge
Mail Merge
keywords: mail merge, mailmerge, merge mail, mail merges, email, emails, e-mail, e-emails
- Choose "Mailings" from the menu bar
Choose "Start Mail Merge"
- Click "Select Recipients"
Choose "User an Existing List..." on the dropdown selection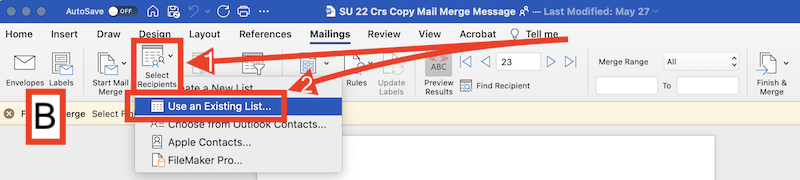
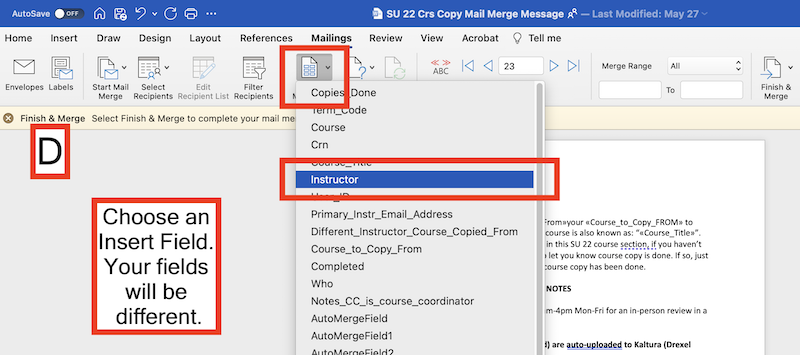
- Click "Insert Merge Field"
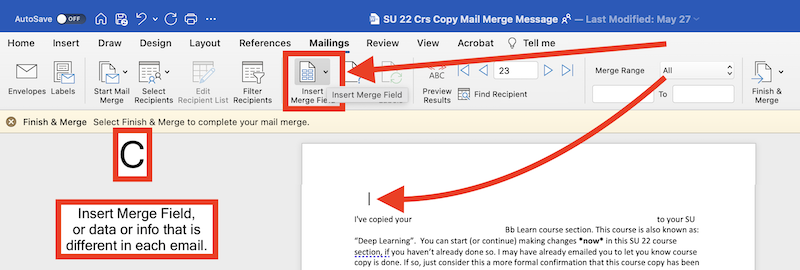
- Choose the right field on the dropdown
- Click "Preview Results" if you want to see name and information
Use arrow keeps to move to previous or next record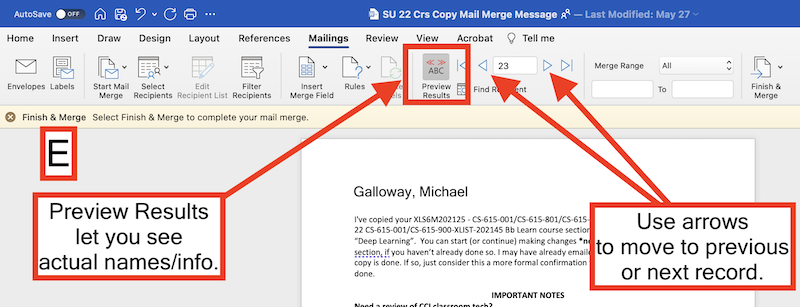
- Click "Finish & Merge"
Choose "Merge to E-mail"
- Click "Send As" dropdown
Choose "HTML Message"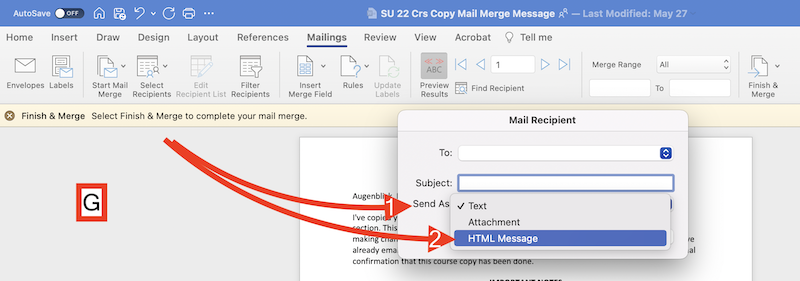
- Choose "To" dropdown
Choose proper recipient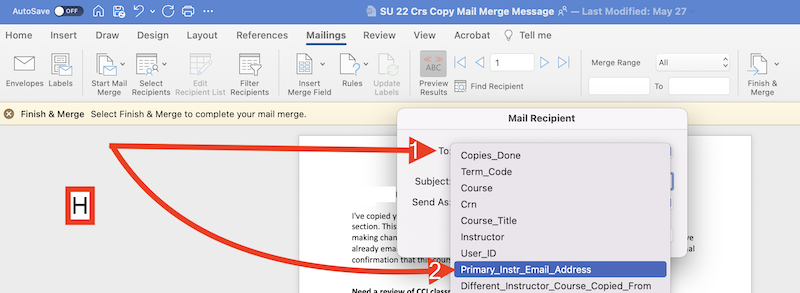
- Enter subject line in Email
Open Outlook
Click "Mail Merge To Outlook"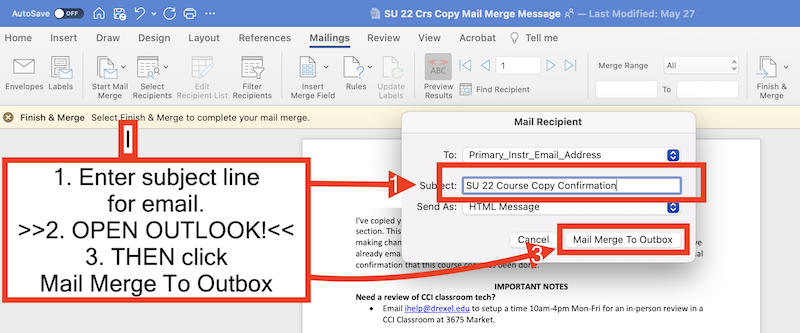
Markup in Microsoft Word
Word has its own "markup" but they call it field codesUseful to use with Word's mail merge
Mail merge is only available in the Outlook application (NOT web/browser)
Word field codes have limited support for if/then statements and such.
This is NOT a markup to track changes and review documents.
- Include links on mail merge in Word
- Note that you want to use HTML for email type
- Choose the CORRECT email addresses, so that you can grab a spreadsheet, and use that for collecting mail merge data.
Recommendation: Put the subject line at the bottom of any mail merge email Word document, so you can easily copy it when you need it.
Note:
Alt+F9 or Alt+Fn+F9 on Windows to activate.
and...
Option+F9 or Option+Fn+F8 on Mac to activate.
Links:
How to insert, convert, and options for Word field codes
Microsoft documentation on field codes